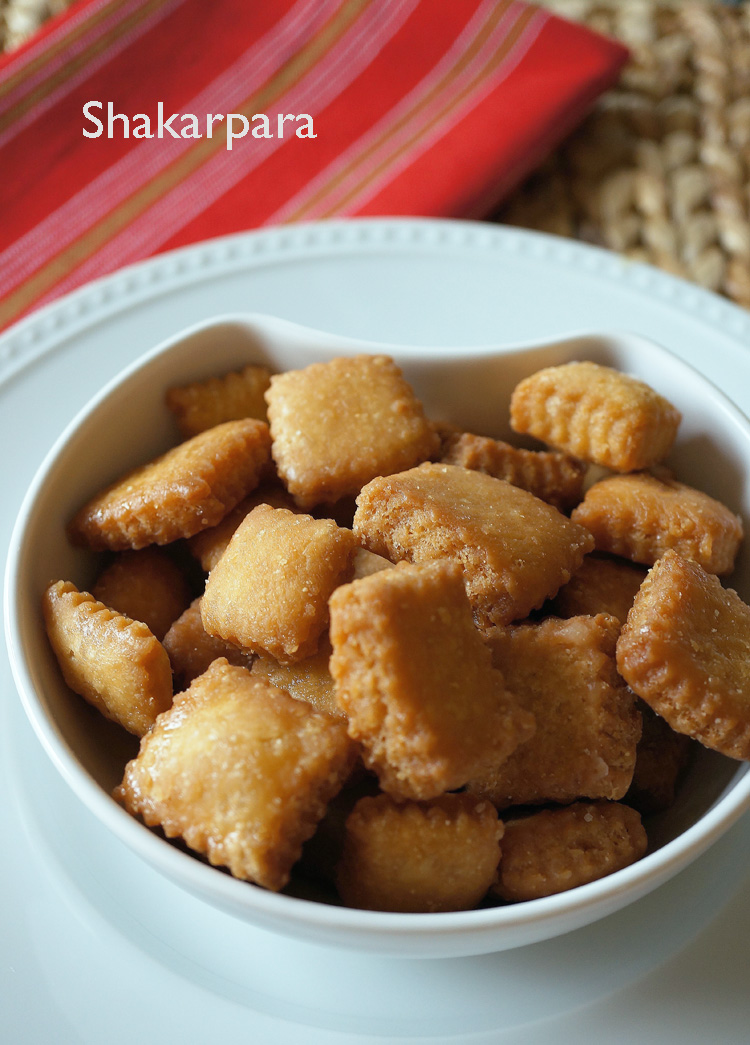
Shakarpara (Shankarpali) – Indian Biscuits

Shakarpara2
Two days to Christmas! Here’s wishing you and your family a Happy Holiday and a delicious New Year!

Christmas is a great time to build lifelong memories with your family. Keeping up with family traditions takes time, energy, and planning. I am so thankful for the memories I have of my family during this time of year.

I am sure many of you have your own Christmas traditions. Please share them with us on my Facebook page or right here on my blog. A few of our family favorites are decorating the Christmas tree, making treats with friends, having family over for Christmas Eve dinner, Secret Santa parties, and of course, a delicious breakfast on Christmas morning (cinnamon rolls are a must)!

Today’s recipe is simple. You will find these little biscuits all over Maharashtra. Shakarpara or Shankarpali, as they are called, are made with all purpose flour, ghee or oil, sugar, and water. These are items you already have in your pantry. All you need to do is knead the dough, let it rest, roll, cut, and deep fry. So, you can even make them today – just in time for Santa’s arrival!

Shakarpara (Shankarpali) – Indian Biscuits
Prep time: 20 minutes (includes rest time)
Cooking time: 30 minutes

Ingredients:
1 cup granulated sugar
1 cup water
½ cup solid ghee, (or 3/4 cup vegetable oil)
5 cups all purpose flour, (approximately)
1 teaspoon salt
2 teaspoons semolina, (sooji, optional)
Oil for deep frying

Directions:
Add sugar, water, and ghee into a saucepan. Place over medium-high heat and stir until the sugar melts. Cool. Whisk flour, salt and semolina in a separate bowl until combined.

Pour the cooled sugar, water, and ghee mixture into the large bowl of an electric mixer, (Kitchen Aid), fitted with a dough hook. With the mixer on slow speed, add the flour, a little at a time, scraping down the bowl, until the mixture comes together. I needed five cups of flour. You might need to add a little more or a little less. Add flour until the mixture comes together into a ball. Turn the mixer on medium speed and knead for three minutes. You can also made the dough without a mixer. Knead with your hands until you have a smooth dough. Let the dough rest for 15 minutes. Knead it again with your hands and then divide the dough into equal portions. Roll to about 1/8 inch thick. Cut into diamond or square shapes.

Add about five inches of oil to a wok or heavy bottomed pan. Heat the oil over medium heat. Then turn the heat to medium-low. Add a small piece of dough. If it rises to the top quickly the oil is too hot. Add a few shakarparas at a time. They must come up slowly. Fry them on low heat so the inside cooks well. Remove when they turn golden brown and drain on paper-towel lined trays. Cool completely before storing them.

Notes:
– I used turbinado sugar for the shakarparas in the picture. The golden crystals are not bleached, so they keep the rich flavor and color of their natural molasses. But I found that the shakarparas were not as sweet as I would have liked, so I coated them with a sugar syrup.
– For the sugar syrup I used one cup granulated sugar and one cup water. Cooked it in a heavy-bottomed pan, over medium heat. When the sugar melted, I add quarter teaspoon lemon juice. The lemon juice keeps crystals from forming. Boil until the sugar reaches one-thread consistency. To do this, keep testing the syrup. Dip a wooden spoon into the syrup and lift out. Allow it to cool. Touch it with your forefinger and then touch your thumb and gently pull apart. When a single thread is formed and it does not break, you’ve reached one-thread consistency. Or use a candy thermometer (234° F–240° F).
– Dip the shakarparas in the syrup, drain the excess syrup with a slotted spoon, and put them on a large cookie sheet. They need to dry out before you store them.


Christmas Treats

Christmas Treats_plate3There are only seven more days to Christmas! Are you ready? My friend and I spent the last two days in my kitchen making Christmas treats for our families. Karanji, rose cookies, namkeen, murukku, ladoo, and chirote are some of the goodies that most Indian homes make during this time of the year. Making these treats can be time-consuming, so about two years ago, I teamed up with my girlfriends to make the process quicker and more fun! While working together we shared stories from our childhood, laughed at pranks we had pulled off, and learned from each other. Time flew by, and before we knew it, we were able to fill our “dabbas” with traditional Christmas delights.

Do you have your own Christmas cooking family tradition? Anyone out there with a good recipe for kul kuls? Please share, either on my Facebook page or here on my blog.

Karanji is everyone’s favorite, so I’m re-posting this recipe for you. I’ve also included a new simple semolina filling.

Karanji final

Karanji with Semolina (Sooji) Filling
Ingredients:
1 cup fine semolina
1 tablespoon poppy seeds/khus khus, (optional)
1 cup desiccated coconut, (unsweetened)
1/4 cup finely chopped nuts, (optional)
1/4 cup golden raisins, (optional)
1 cup fine sugar
1/2 tsp cardamom powder, (optional)

Directions:
Place a large wok, over medium-low heat. Add semolina and dry roast. Stir constantly so it does not burn. It is ready when its turns light brown and smells fragrant. Remove from the wok and put it into a large bowl. Dry roast the poppy seeds for two minutes. Add it to the semolina. Next, dry roast the coconut. Stir constantly until it turns light brown and fragrant. Add the roasted coconut, chopped nuts, raisins, sugar, and cardamom powder to the semolina. Mix everything well. Make this filling a day before you make the karanjis.

Murukku

Murukku5

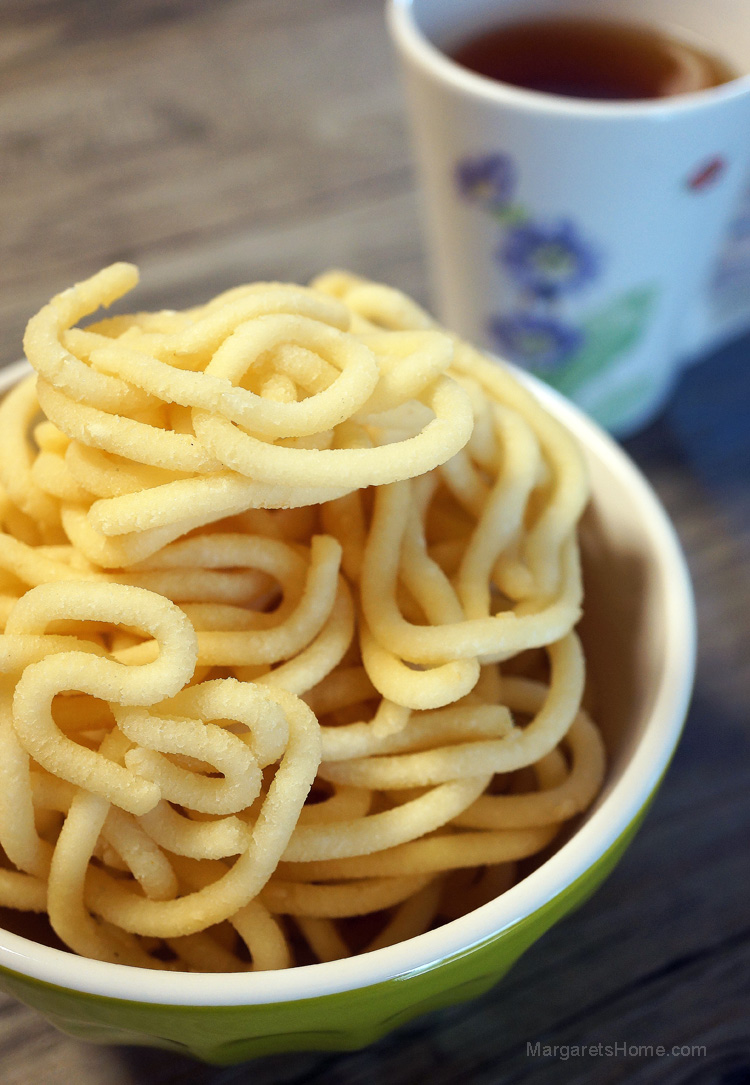
True confession – I love Indian snacks and I can live on them. I would rather snack all day than eat my regular meals! Murukku, also known as chakali in Hindi, is a traditional snack from Tamil Nadu. It is most often made by mixing rice flour, black gram flour (urad dal flour), water, salt, and either sesame seeds or cumin seeds. The ingredients are mixed together into a dough and then shaped into spiral or coil shapes by hand or by using a mould. They are then deep fried in oil. There are a number of varieties and it seems like every household has their own secret recipe.

My recipe is fairly easy and if you follow the measurements carefully, making these light, crunchy, salty treats is easy. They last for weeks if they are kept in an airtight container. However, if you are making murukku for the first time, I suggest you start by making only half the recipe. I bought the rice flour and black gram flour from the Indian grocery store and they work beautifully.

I used the murukku mould with its three-hole disc to make these murukkus. The murukku mould that I used was handed down to me by my mother. I’ve included a picture at the bottom of this page. Back in those days, it was made from brass. I remember one of the handles broke and my mom had to have the handle welded back into place. It is now one of my antique kitchen treasures. Do any of you have kitchen treasures that were handed down to you? Please share your comments with us.

Murukku
Prep time: 8 minutes
Cook time: 40 minutes
Makes: 40

Ingredients:
4 cups fine rice flour
½ cup black gram flour, (urad dal flour)
¼ teaspoon asafoetida powder
1 tablespoon sesame seeds
1½ teaspoons salt, (depending on your preference)
6 tablespoons melted butter
1½ cups water (approximately)
Oil for deep frying

Directions:
Put the rice flour, black gram flour, asafoetida powder, sesame seeds, and salt into a large bowl. Use a whisk or your fingers to mix all the ingredients. Add the melted butter and mix again with your finger tips so the butter and flour turn crumbly. To make the dough, I used approximately one and a half cups of water. Use your judgement and add just enough water slowly to make a smooth dough. The dough should not be sticky and there should not be any cracks in the dough.

Heat enough oil for deep frying in a wok (kadai). Use the murukku mould and the three-hole disc to make these murukkus. Make a small ball from the murukku dough that will fit into the murukku mould. Keep the rest of the dough covered with a damp paper towel so the dough will not dry out. I first made about six murukkus on a large zip lock bag and then picked them up one by one and put them into the oil. That way the shape of the murukkus turn out better and you don’t have to hold the mould over hot oil.

Fry the murukkus, on both sides over medium heat, until the sizzling stops. Drain them on paper towels. Let them cool completely before you store them in an airtight container. Have fun snacking!
Murukku Mould

Samosa Chaat

Samosa Chaat3

Just the mention of the word “Chaat” makes my mouth water. Chaat is a word used for many of India’s favorite street foods like bhel puri and paani puri. The last time I was in India I saw a street cart with the sign, “paani puri made with mineral water.” It was nice to see that local vendors are making efforts to make chaat safe for foreigners, or locals-living-abroad, such as myself.

When I was a young girl, during my summer holidays, several schoolmates and I used to go to the Pune Cantonment swimming pool. Right after our swimming session we would stop by the street carts for our fix of samosa chaat, bhel puri, and paani puri. What fun we had! I wonder if anyone of them remembers those days.

On one of our vacations to India my children and I stopped in Mumbai. We went to a restaurant called Status. We heard they were famous for their samosa chaat. We were hungry after a whole morning of shopping. The three of us were ravenous and we ordered a whole bunch of dishes. My son ordered two plates of samosa chaat and the waiter told him that would be too much for the three of us. That one plate along with all the rest of the food that we had ordered would definitely be enough. But my son insisted on two plates. When our food came, we could hardly finish the first plate of samosa chaat. The samosas were humongous! That was a meal in itself. In the background we could hear the waiters whispering to each other with smiles on their faces.

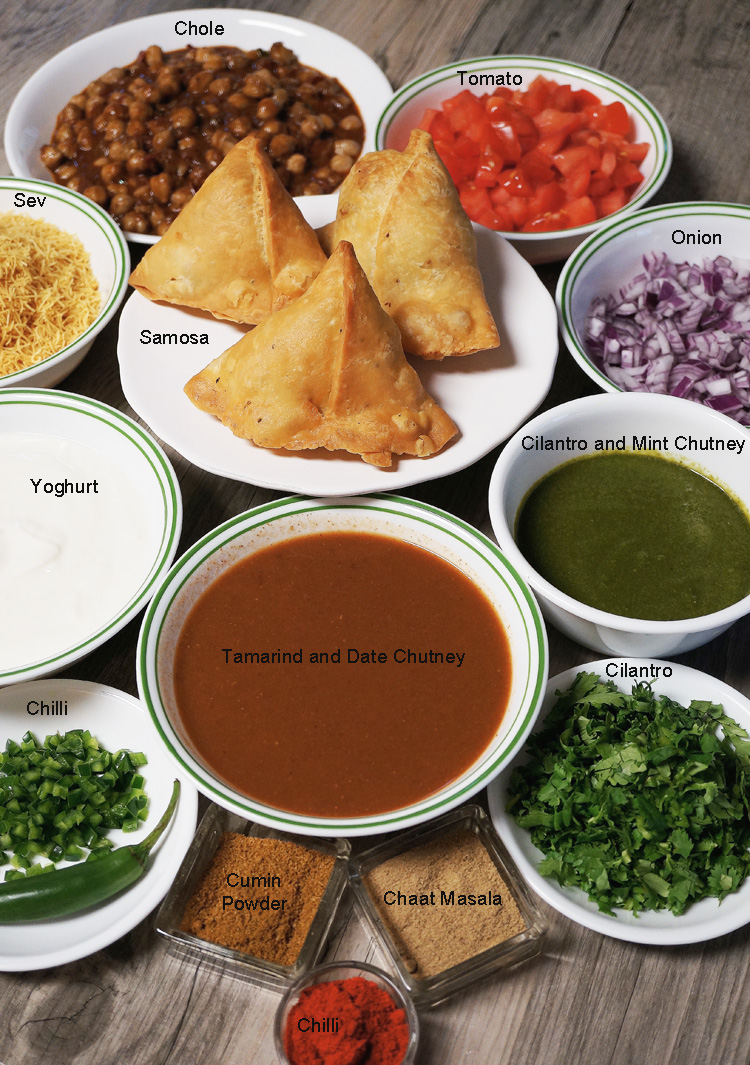
Making samosa chaat at home is a time consuming job, but totally worth it. My friends and family have great fun assembling their own plates of samosa chaat. I made my own samosas but you can buy yours from an Indian store or restaurant. However, it is well worth making the chole, cilantro and mint chutney, and the date and tamarind chutney from scratch as homemade tastes best. So, here is my take on the famous samosa chaat.

If you plan to use dry chickpeas/garbanzo/Kabuli channa follow the Chole recipe from my previous recipe.

Chole – using canned garbanzo beans
Prep time: 10 minutes
Cooking time: 35 minutes
Serves: 6

For the spice mix

Ingredients:
3 tablespoons coriander seeds
4 black cardamoms, peel and use seeds
5 cloves
1-inch piece cinnamon stick
1 teaspoon whole black pepper
1 bay leaf, (tejpatta)
4 whole dry red chillies, (depending on heat and your preference)
2 teaspoons cumin seeds
3 tablespoons pomegranate seeds, (anardana)

Directions:
In a small pan, over low heat, roast the above mentioned ingredients until they smell fragrant and turn a very dark brown. Cool completely and then grind to a powder in a coffee grinder. Set aside.

For the Chole
Ingredients:
3 tablespoons oil
2 cups finely chopped onion
2 tablespoons finely chopped ginger
1 tablespoon finely chopped green chillies, (optional)
1 cup diced tomatoes
2 teaspoons Kashmiri chilli powder
Salt
2 15.5 oz cans of garbanzo beans
3 cups water

Directions:
In a large heavy bottomed saucepan, over medium-high heat, add oil. When the oil begins to shimmer add the onions. When they turn translucent add the ginger and fry for a minute. Add the green chillies and tomatoes. Keep stirring until the tomatoes are well cooked you see the oil separating from the tomato-onion mixture. Add the spice mix, Kashmiri chilli powder, and salt. Fry for 30 seconds.

Add the garbanzo beans along with the liquid in the cans and three cups of water. If you like the chole gravy to be a little thick, use a potato masher to mash a small portion of the garbanzo beans. Bring to a simmer and cook for an additional 30 minutes over medium-low heat, so the flavors can meld. Stir occasionally to make sure that the gravy does not stick to the bottom of the pan. Remove from heat. Serve on top of samosa chaat.

Date and Tamarind Chutney
Prep time: 10 minutes
Cooking time: 10 minutes
Serves: 6

Ingredients:
2 teaspoons cumin seeds
½ teaspoon fennel seeds
1 cup dates, pitted and roughly chopped
½ cup brown sugar
1 cup tamarind extract
3 teaspoons red chilli powder
2 teaspoons ginger powder
3 cups water
2 teaspoons chaat masala
1½ teaspoons black salt

Directions:
Add cumin and fennel seeds to a small non-stick pan. Roast over low heat until fragrant. Cool and grind to a powder.

Add cumin and fennel powder, chopped dates, brown sugar, tamarind pulp, chilli powder, ginger powder, chaat masala, salt and two cups of water to a small saucepan. Place the pan over medium-high heat. Stir and bring to a boil. Turn the heat to medium-low and continue to cook for ten minutes. Cool completely. Add to a blender and process until smooth. Transfer to a bowl. Serve with samosa chaat.

Cilantro and Mint Chutney
Prep time: 5 minutes
Cooking time: 5 minutes
Serves: 6

Ingredients:
1 cup fresh cilantro leaves
½ cup fresh mint leaves
3-4 green chillies, (depending on heat and your preference)
2 tablespoons water
Salt
1/4 tsp sugar
2 tablespoons lemon juice

Directions:
Roughly chop the cilantro, mint, and green chillies. Add to a blender and process until smooth. Use a tablespoon or two of water if necessary. Add black salt and sugar. Blend again and transfer to a bowl. Stir in lemon juice. Serve with samosa chaat

Plating and Garnishing

Ingredients:
12 Samosas, (can be warmed up in an oven at 400 degrees F for 6-8 minutes)
2 cups plain yoghurt, whipped
2 cups fine sev, (can be bought from Indian grocery store)
1 cup finely diced onion
1 cup finely diced tomato
2 tablespoons finely chopped green chillies, (optional)
¼ cup finely chopped cilantro
2 teaspoons roasted and powdered cumin seeds
2 teaspoons chaat masala
2 teaspoons chilli powder

Samosa Chaat4

Directions:
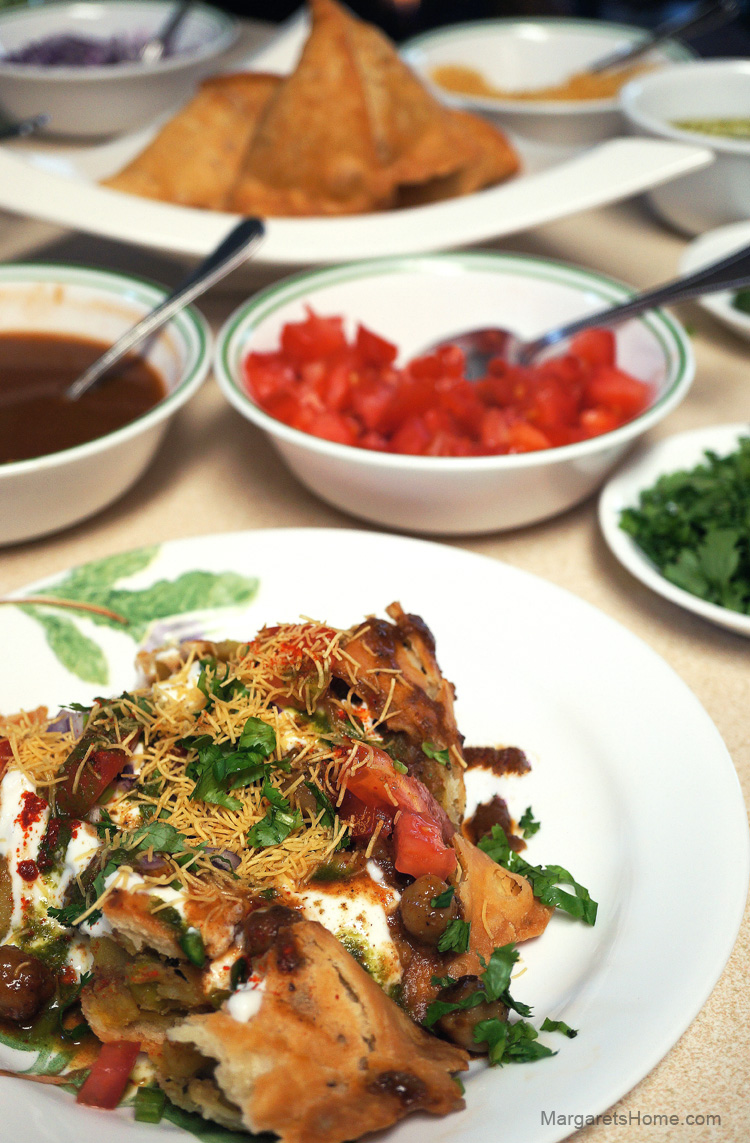
Break two samosas into four or five large chunks and put them on a plate. Pour a large spoonful of chole over them. Scatter a heaped teaspoon of chopped onion and tomato. Add a few bits of green chillies, if you like your chaat to be spicy. Sprinkle with a pinch of cumin, chilli and chaat masala powders. Drizzle a tablespoon of yoghurt, tamarind and date chutney, and cilantro and mint chutney over them. Finally top them off with sev and bits of chopped cilantro. There you have it – one of Indian’s favorite street foods!

Cilantro Pesto

Cilantro Pesto1

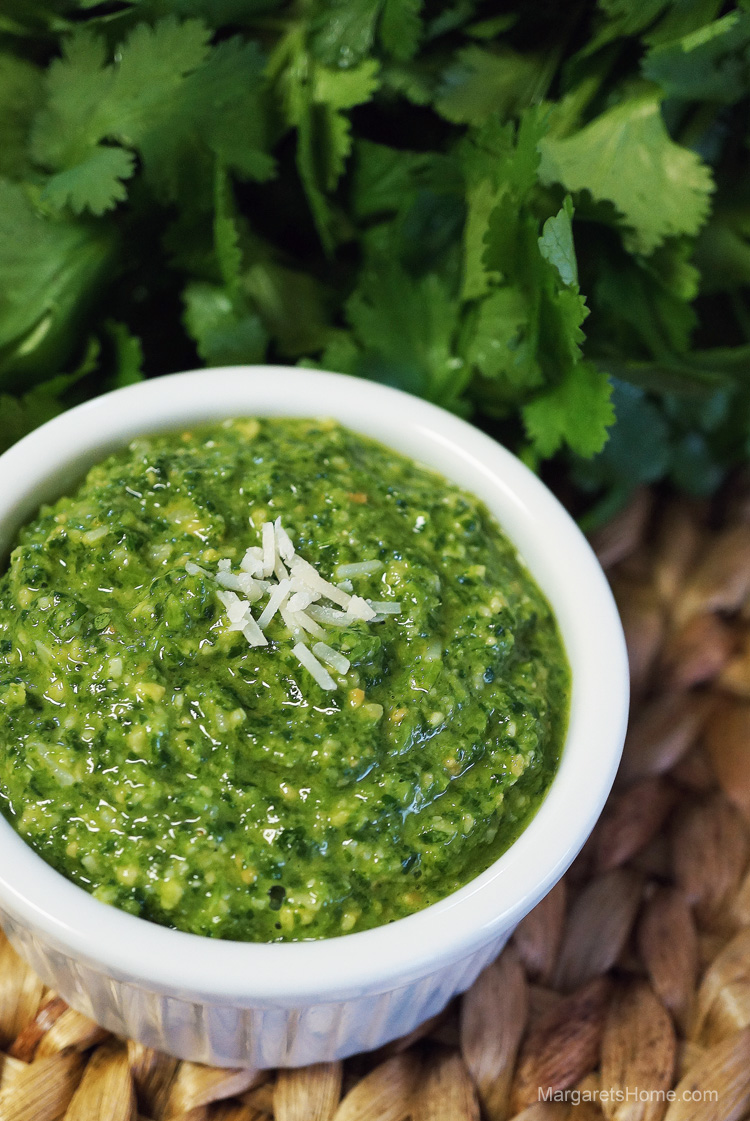
This recipe is a delightful version of the classic basil pesto, especially for people like me that are not big fans of basil.

Cilantro pesto can be used in several ways. Use it as a condiment on your sandwich and bruschetta or as dressing on pasta salad. Add lots of shredded cheese to it and use it as a filling in puffs. A tablespoon added to hummus or egg salad creates an extra layer of flavor. Garnish your tomato soup with cilantro pesto to take it to the next level. These are just a few ideas. I am sure you can come up with many more of your own. Until next week, have fun cooking.

Cilantro Pesto
Prep time: 8 minutes
Cooking time: 8 minutes
Makes: About 1 cup

Ingredients:
½ cup slivered almonds
2 cups cilantro, roughly chopped
1 shallot, roughly chopped
1 serrano chilli, chopped and seeded, optional
1 garlic clove, roughly chopped
2 tablespoons parmesan cheese
salt
2 tablespoons lemon juice
¼ cup olive oil

Directions:
Place a small pan over medium heat. Add the almonds and roast them until they turn golden and fragrant. Remove and cool.

In the bowl of your food processor add the cooled almonds and pulse until coarsely chopped.

Add cilantro, shallot, serrano, garlic, parmesan cheese, salt, and lemon juice. Pulse until coarsely ground. With the food processor running, slowly drizzle olive oil. Keep refrigerated until you are ready to use.

Vote for my Almond Brittle Recipe

almond-brittle24

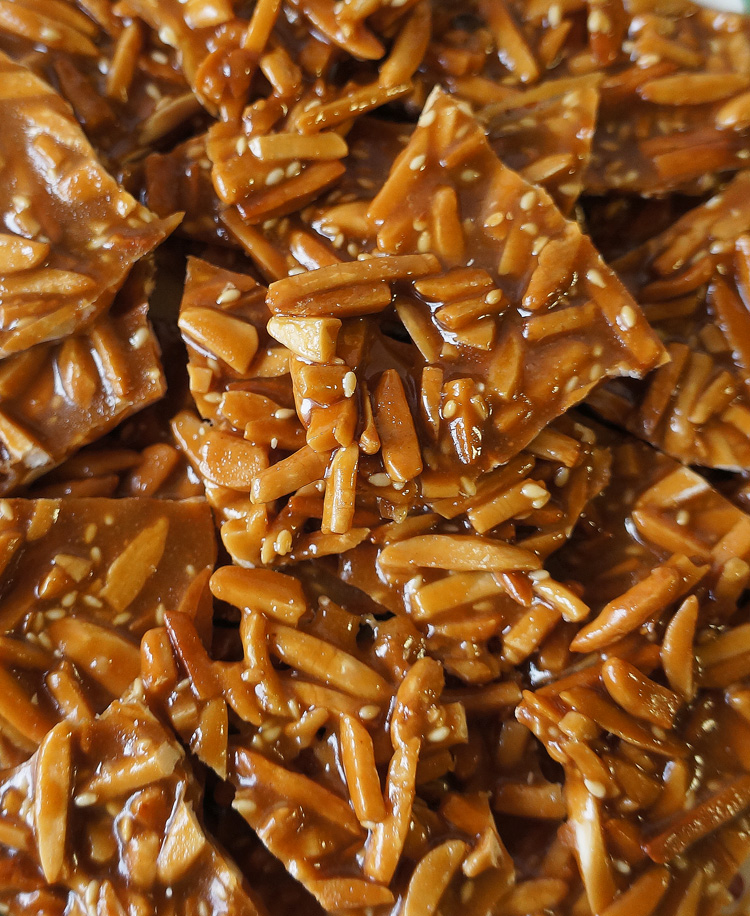
The holidays are just around the corner, and during this time, many of my friends ask for my Almond Brittle recipe. I’m reposting the recipe below, and I’ve also entered it in the Fisher Nuts “My Fresh Twist” recipe contest. Click here to vote for my recipe! You can vote for my recipe five times a day until November 5. Hint: Just hit the vote button 5 times in a row! Many of you have tried and tasted my Almond Brittle so I am sure I’ll get your vote. Thanks for your support.

This recipe was originally posted on December 18, 2012.

Almond Brittle
½ stick butter (4 tablespoons), room temperature
¾ cup sugar
1/8 teaspoon salt
1 cup slivered almonds
2 tablespoons sesame seeds

Line a baking sheet with foil and set aside.

Place a heavy-bottomed saucepan over medium heat. Add butter (make sure it is at room temperature), sugar and salt. Stir with a wooden spoon until the butter, sugar and salt are well incorporated, and then add almonds and sesame seeds. Turn heat up to medium-high.

This is the point where you have to pay close attention, and keep stirring constantly. When the almonds and sugar begin to brown, and turn to a light caramel color, and you see the melted butter separate from the rest of the mixture, turn off the heat. Very carefully, pour the mixture onto the foil lined baking sheet. Spread to a thin, even layer with the back of the wooden spoon. Let the almond brittle cool completely before you snap them into pieces.

Store in an airtight container. Or, put them in little bags or boxes, as shown in the picture, and share them with your friends. They make delectable little gifts for Christmas.

Video tips for perfecting your almond brittle

Honey and Spice Roasted Almonds

Honey & Spice Roasted Almonds4

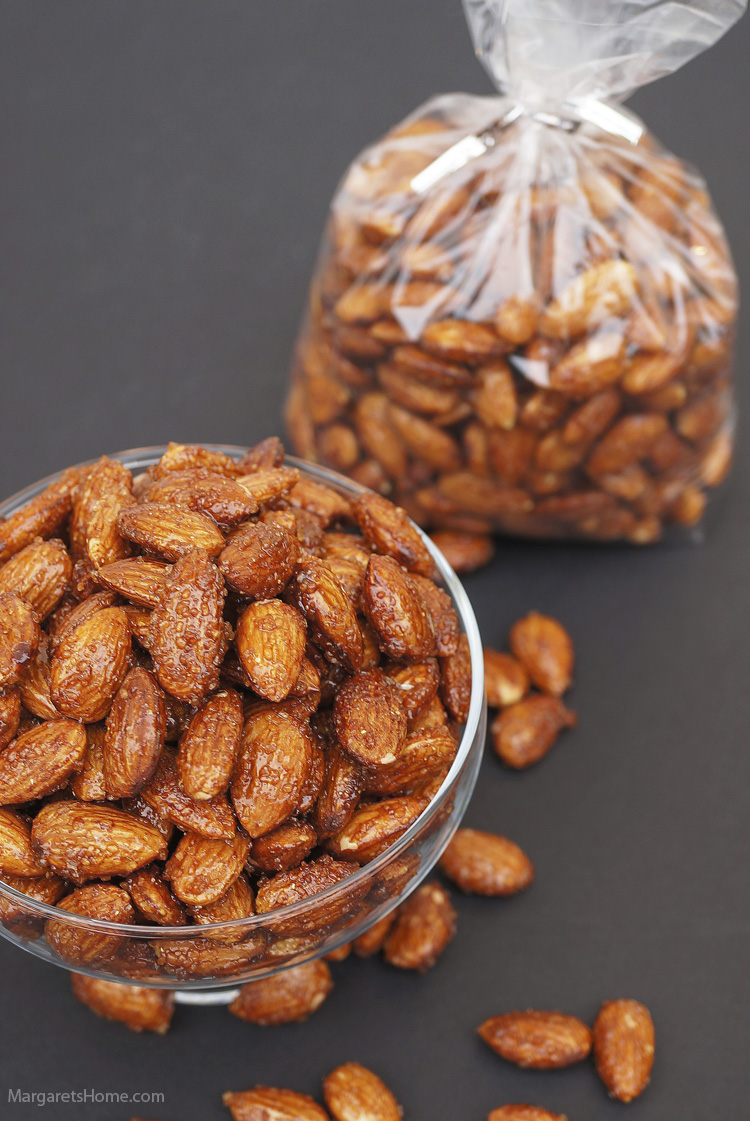
WARNING – These Honey and Spice Roasted Almonds are highly addictive!

I’ve tried different spice mixes and I think I finally found the winning combination for these honey and spice roasted almonds. The fusion of sweet, salty, spicy, smoky flavors and, of course, the crunch makes these nuts the perfect snack. At least that is my opinion. Let me know what you think, once you’ve tried them yourself.

Honey and Spice Roasted Almonds
Prep time: 5 minutes
Cooking time: 20 minutes
Serves: 10

3 cups whole raw almonds with skins on
2 tablespoons Turbinado sugar, (raw sugar)
1 teaspoon salt
2 teaspoons chilli powder, (depending on heat and your preference)
½ teaspoon smoked paprika, (optional)
½ teaspoon cumin powder
½ teaspoon coriander powder
2 tablespoons honey
1 tablespoon water
2 teaspoons peanut oil

Preheat oven to 350 degrees F. Spread almonds onto a foil-lined baking sheet. Bake for eight minutes, rotate the pan, and bake for another eight minutes.

While almonds are toasting, combine sugar, salt, chilli, paprika, cumin, and coriander powder in a small bowl and set aside.

In a wide-bottomed saucepan bring honey, water, and oil to a boil, over medium-high heat. You will see small bubbles appear on the surface. Immediately stir in toasted almonds and cook until the nuts are all coated and the liquid is absorbed. Turn off the heat. Sprinkle the sugar, salt, and spice mix over the almonds. Toss well to coat all the almonds.

Spread nuts back onto the foil lined baking sheet in a single layer. Cool completely and break the almonds apart. The honey and spice roasted almonds can be stored in an air-tight container for a month. But, I bet they won’t last that long!

Minced Chicken Puffs

Minced Chicken and Egg Puffs

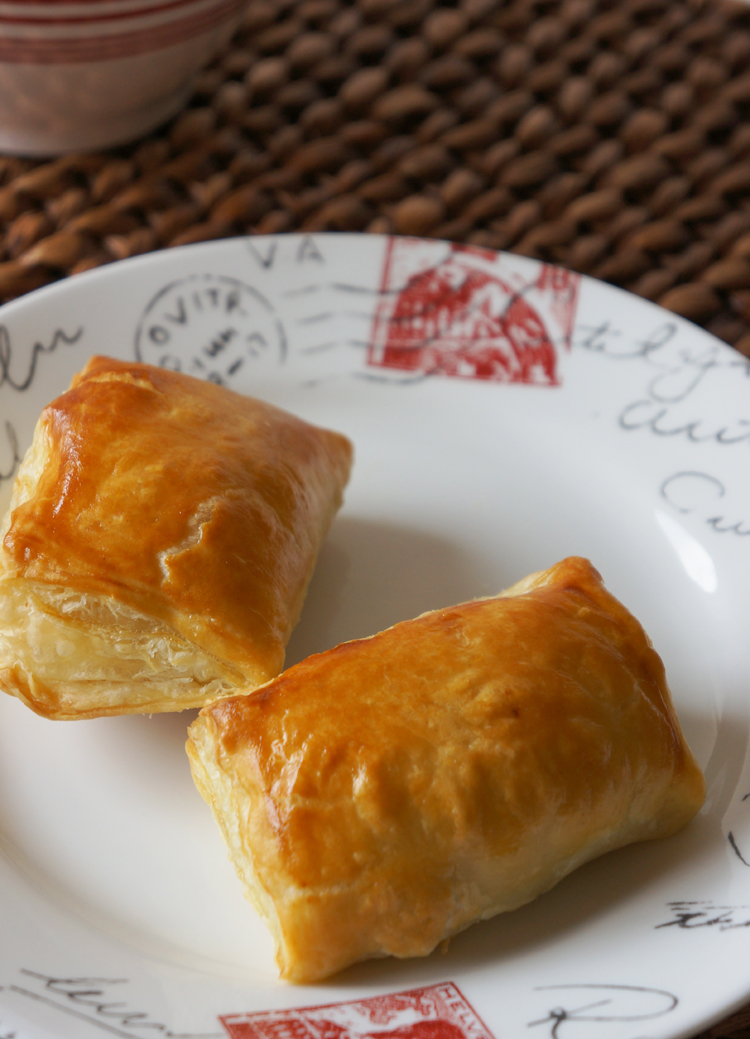
Two lovely young ladies have asked me to share a recipe for puffs, so this blog post is especially for them. Chicken puffs, eggs puffs, and vegetable puffs bring back memories of bakery shops in India. The lovely aroma that came from these shops, as you passed by, was magnetic.

Egg puffs were a popular item in a bakery in Manipal and my children and I would pick some up every Friday afternoon. It was in Manipal where I learned how to make puff pastry from scratch. My teacher was a young lady from Malaysia. Making puff pastry is a tedious process and since puff pastry sheets are available in the frozen section of our grocery stores in the U.S., I’ve used them to save time. This recipe will give you the basics on how to make puffs but use your imagination to make the filling your own. Enjoy.

Minced Chicken Puffs
Prep time: 10 minutes
Cooking time: 35 minutes
Serves: 6

Ingredients:
1 pkg. (17.3-ounces) Puff Pastry Sheets, thawed
2 tablespoons oil
1 teaspoon mustard seeds
½ teaspoon cumin seeds
2 cups finely chopped onion
Salt
1 tablespoon finely chopped ginger
1 tablespoon finely chopped garlic
2 teaspoon finely chopped green chillies, (depending on heat and your preference)
2 tablespoons finely chopped cilantro
¼ cup finely chopped tomato
3 teaspoons Shakti meat masala powder, (or any other meat masala powder)
1 pound minced chicken
1 egg
1 tablespoon water

Directions:
Thaw the pastry sheets at room temperature for 40 minutes or use the directions on the package. Heat the oven to 400°F. Lightly grease or line two baking sheets with parchment paper. Stir the egg and water in a small bowl with a fork.

Heat oil in a small non-stick frying pan over medium-high heat. Add mustard seeds and when they sputter add cumin seeds, onion, and salt. Cook onions until they turn translucent. Then add the ginger, garlic, green chillies, and cilantro. Cook for three minutes or until the raw smell of the garlic disappears. Add tomato and the meat masala powder. Let the tomato cook until the oil separates. Turn the heat to low and add minced chicken. Break up the chicken with your wooden spoon, so there are no lumps. Then turn the heat to medium. Cover with a lid and cook for 10 minutes. Stir to dry out any water that may remain. Remove from heat and cool completely.

To assemble the puffs:
Unfold one pastry sheet on a lightly floured surface.
Cut the pastry sheet into three strips along the fold marks. Gently roll each strip to make it slightly wider.
Cut each strip in half crosswise, making six pastry rectangles.
Place the pastry rectangles onto the baking sheet.
Put one heaped teaspoon of the chicken filling onto each pastry rectangle.
Brush the edges of the pastry rectangles with a little egg mixture or water.
Fold the pastries in half over the filling to form small rectangles.
Brush the filled puffs with the egg mixture.
Put the tray in the freezer.
Repeat this process with the second puff pastry sheet.
Bake the puffs for 20-25 minutes or until they are golden brown. Let the puffs cool on the baking sheets on wire racks for 10 minutes. Serve with ketchup or cilantro and mint chutney.

Please note:
There are two pastry sheets in one package. If you do not want to use the second pastry sheet, you can wrap it in parchment paper, put it in a ziplock bag, and freeze it. Or, you can fill the puffs and freeze them individually wrapped in parchment paper. Bake them at 400°F for 30-35 minutes straight from the freezer. No thawing required.


Chole Aur Bhature – Spicy Chickpeas with deep fried Indian Bread

Chhole Aur Bhatura5

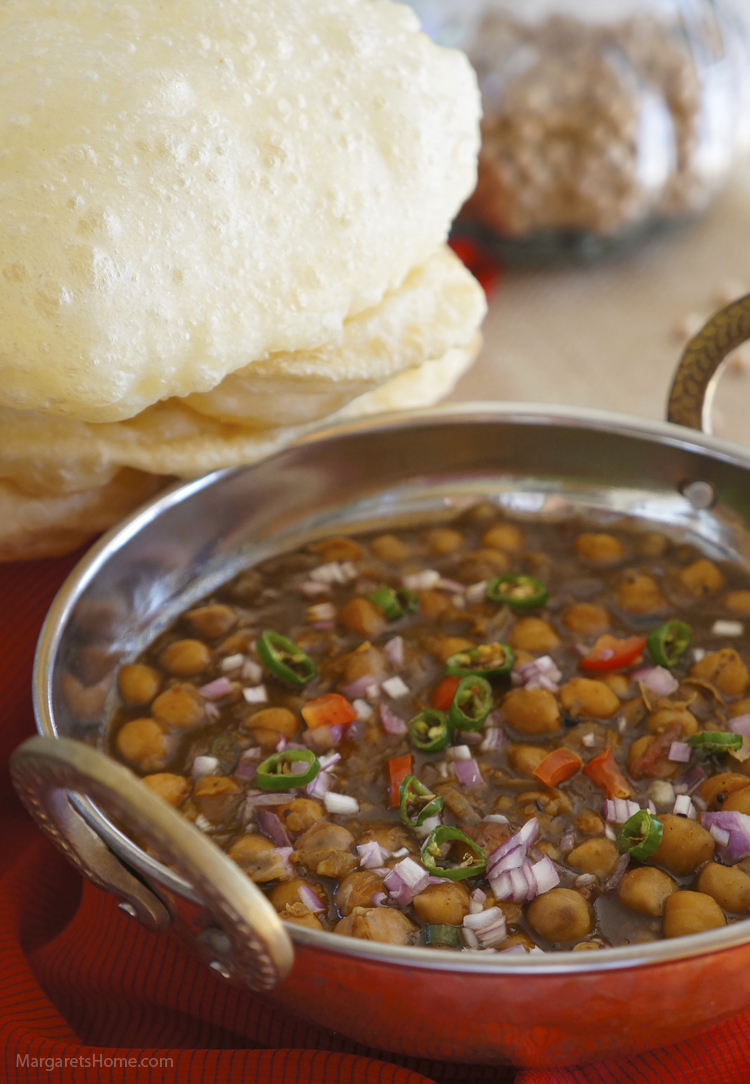
Chole and bhature are made for each other. Both of them are classic dishes from Punjab, North India, and they are eaten together for breakfast, lunch, dinner or as a snack at tea time. Chole is made with chickpeas/garbanzo. It is called Kabuli channa in Hindi. Bhature is a deep fried, leavened bread made with all purpose flour.

The recipe for chole calls for a spice mix that is unique to North Indian cuisine. If you don’t normally use these spices, this is a great opportunity to learn and develop a taste for them. Many cooks use tea bags while cooking chickpeas to darken the color of this dish. I’ve used cocoa instead. To save time, you can use canned chickpeas. Drain them well and run cold water over them. Make the spice mix and then proceed to make chole.

I’ve been on a quest for the perfect bhature, using different ingredients like yeast, boiled potato, sago, yoghurt etc. to give it lightness, great taste, and texture. But this time, the compliment from my son ended my search for the perfect bhature. He said, “These bhatures are pillowy and I can’t stop eating them.” So try this recipe and your search might end too!

I made a large batch of chole and bhature that could feed six to eight people, but you can easily half the recipe. Make this with a side of cucumber salad and you have a complete meal.

Chole Aur Bhature
Soak the dry chickpeas: Overnight
Rest the dough for bhature: 1 hour
Prep time: 20 minutes
Cooking time: 1 hour and 20 minutes for both recipes
Serves: 6-8

If using dry chickpeas/garbanzo/Kabuli channa

3 cups dry chickpeas soaked overnight in hot water
¼ teaspoon baking soda (optional)
2 tablespoons cocoa powder (optional)

Soak the dry chickpeas overnight. Wash them in several changes of water. Put the chickpeas, cocoa and soda in a pressure cooker with enough water to cover them. Pressure cook for 20 minutes. Check on the cooking time for your particular pressure cooker. The soda is added to make the chickpeas soft, but don’t add too much.

For the spice mix
3 tablespoons coriander seeds
4 black cardamoms, peel and use seeds
5 cloves
1-inch piece cinnamon stick
1 teaspoon whole black pepper
1 bay leaf, (tejpatta)
4 whole dry red chillies, (depending on heat and your preference)
2 teaspoons cumin seeds
3 tablespoons pomegranate seeds, (anardana)

In a heavy bottomed pan, over low heat, roast the above mentioned ingredients until they smell fragrant and turn a very dark brown. Cool completely and then grind to a powder in a coffee grinder. Set aside.

For the Chloe
3 tablespoons oil
2 cups finely chopped onion
2 tablespoons finely chopped ginger
1 tablespoon finely chopped green chillies, (optional)
1 cup diced tomatoes
2 teaspoons Kashmiri chilli powder
3 cups water
salt to taste

In a large heavy bottomed saucepan, over medium-high heat, add oil. When the oil begins to shimmer add the onions. When they turn translucent add the ginger and fry for a minute. Add the green chillies and tomatoes. Keep stirring until the tomatoes are well cooked and the oil begins to separate. Add the ground spice mix, Kashmiri chilli powder, and salt.

Then add the cooked chickpeas and any water left in the pressure cooker. I like gravy in my chole so I added three cups of water. If you like the Chloe a little thick then add less water. Bring to a simmer and cook for an additional 30 minutes, so the flavors can meld. Stir occasionally to make sure that it does not stick to the bottom of the pan. Remove from heat and garnish with chopped green chillies, tomatoes, red onion and lemon wedges. Serve with piping hot bhature.

Bhature – Makes 20
3 ¾ cups all-purpose flour
¾ teaspoon salt
¼ teaspoon baking soda
3 tablespoons semolina, (sooji)
1 1/3 cups buttermilk
¼ cup canola oil
3 teaspoons turbinado sugar
Oil for deep frying

In a large bowl sift flour, salt, soda, and semolina. In another small bowl whisk buttermilk, oil, and sugar until the sugar dissolves.

Make a well in the flour and add one cup of the buttermilk, oil and sugar mix. Stir to bring the flour and buttermilk together. Add the 1/3 cup of buttermilk mix, one tablespoon at a time, while you knead. Use only the amount of buttermilk you need to make a soft, smooth and pliable dough. I used the entire amount, but if you feel the dough is getting too sticky, don’t use the entire amount. Knead well for at least seven minutes. Cover the dough with a damp cloth and let it rest for one hour.

Roll the dough into a long log on a lightly floured surface. With a knife cut the log into 20 equal sized portions and roll them in the palm of your hands into smooth balls. On a lightly floured board roll the balls into an oval shape, about ¼-inch in thickness.

Heat oil for deep frying in a wok. Gently slide, one bhature at a time, from the edge of the wok, into the hot oil. When it puffs up, turn and fry the other side until you see specks of gold on the surface. Drain on a paper-towel lined tray. Serve bhature with Chole.

Tuna Cutlets

Tuna Cutlet3Tuna cutlets used to be a popular item on my menu several years ago. I made some over the weekend so I thought I would share my recipe with you. The list of ingredients may look daunting but this recipe is a keeper and you will be happy you tried it. Sometimes I add a handful of chopped walnuts into the mix and it adds a great crunch to the cutlet.

You can use these cutlets as a side dish, an appetizer, or a snack. I have used them in sandwiches with a chipolte mayonnaise spread or cilantro and mint chutney. I’ve also eaten them just rolled up with some chopped onions in a naan or paratha. Eat them any way you please!

Tuna Cutlets
3 7oz cans (I used white tuna in water)
2 medium potatoes, boiled and mashed
2 cups finely chopped red onion
3 tablespoons finely chopped ginger
3 tablespoons finely chopped garlic
6 finely chopped green chillies, optional
½ cup finely chopped cilantro
1 teaspoon chilli powder
½ teaspoon chilli flakes
1 teaspoon pepper powder
½ teaspoon turmeric powder
1 teaspoon garam masala powder
Salt
2 tablespoons lime juice
½ cup all purpose flour
3 eggs
1 cup panko bread crumbs
Oil for seasoning and shallow frying

Drain and flake the tuna using a fork. Set aside.

Heat a non stick pan over medium high heat. Add three tablespoons of oil and when it shimmers add the chopped onion and fry until the onions turn light brown. Add ginger, garlic, and green chillies. Sauté for two minutes. Turn the heat to low and add the chilli powder, pepper, turmeric, garam masala and two teaspoons of salt. Sauté for a minute and then add the tuna. Fry until the pieces of tuna turn light brown. Add chopped cilantro and lemon juice and turn off the heat. Let the tuna mixture cool for 10-15 minutes and then add the mashed potato. Mix well with a potato masher. At this point you might want to taste to see if you need more salt. Form the cutlets into whatever shape you desire.

Arrange the breading ingredients in an assembly-line fashion. First, in a shallow dish season flour with ¼ teaspoon salt. In another shallow dish, whisk eggs with one tablespoon water and ¼ teaspoon salt. In a third shallow dish put the panko bread crumbs. Working with one piece at a time, dredge both sides of the cutlet in the flour, knocking off the excess. Then dip both sides of floured cutlet in the egg mixture. Finally, coat both sides of the cutlet with panko bread crumbs.

Set a large 12-inch skillet over medium-high heat and pour in enough oil for shallow frying, about one and a half inches. When the oil is hot, about five minutes, add the cutlets. Fry them in batches rather than over crowding the skillet. Fry the cutlets until golden brown on both sides. Transfer them to a paper towel-lined tray. These cutlets can be served with a cilantro and mint chutney. The recipe for the cilantro and mint chutney can be found at the bottom of the Bangalore Vadais post.