Reposting – Doughnuts – Indian Style

Doughnuts Usha
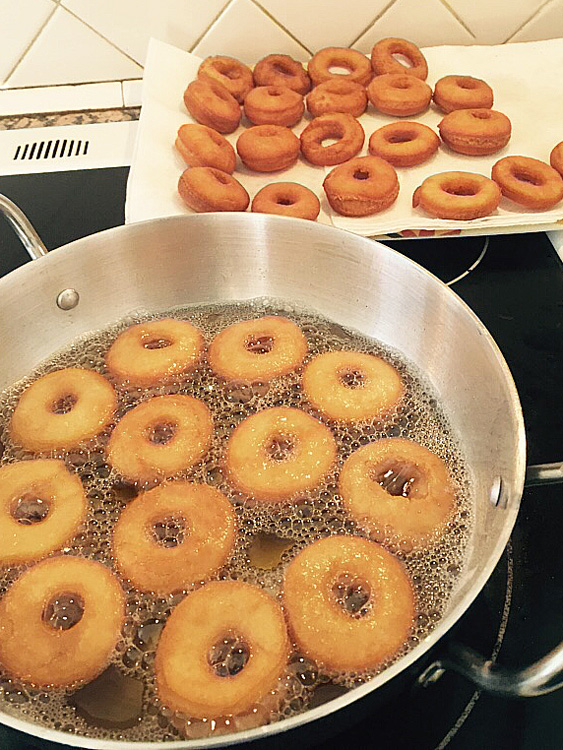
This picture was taken by my friend, Usha David, who made these doughnuts for her family recently. Thank you for sharing this picture with me, Usha.

Doughnuts – Indian Style
Ingredients:
2 cups all-purpose flour, plus more for dusting
1 cup confectioners’ sugar
¼ teaspoon salt
1½ teaspoon baking powder
1 egg
¼ cup vegetable oil or melted ghee
1 teaspoon vanilla
¼ cup milk
Peanut or canola oil for deep-frying
Confectioners’ sugar for dusting

Directions:
In a bowl, sift flour, sugar, salt, and baking powder. In another bowl whisk together egg, oil and vanilla. Add egg mixture into the flour and gently mix until crumbly. Add milk little by little until the dough hold together. Add a few teaspoons of flour if the dough is sticky. Knead until it forms a nice smooth dough. Cover with a damp paper towel, and let it rest for 15 minutes.

Divide the dough into two portions. Turn one portion out on to a lightly floured work surface. Roll out to a ten inch round. Cut using a doughnut cutter which is dipped in a little flour. This helps the doughnuts to slide off the cutter easily. Do the same with the other portion of the dough. Line a platter with paper towels.

In a deep, heavy saucepan, pour in oil to a depth of two inches, and heat. When oil is hot place a few doughnuts at a time in the hot oil. Using a slotted spoon remove doughnuts when they turn golden brown on both sides. Place them on paper towel lined platter to drain. If you like, you can use a fine mesh sieve to dust the doughnuts with confectioners’ sugar.

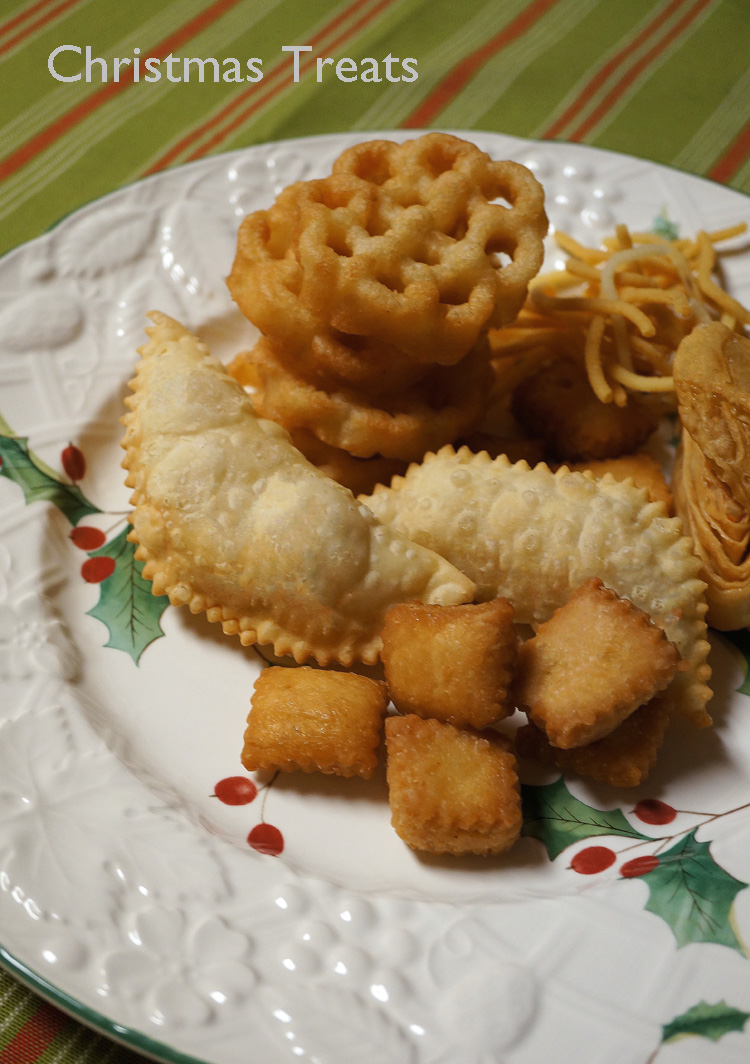
Christmas Treats

Christmas Treats_plate3There are only seven more days to Christmas! Are you ready? My friend and I spent the last two days in my kitchen making Christmas treats for our families. Karanji, rose cookies, namkeen, murukku, ladoo, and chirote are some of the goodies that most Indian homes make during this time of the year. Making these treats can be time-consuming, so about two years ago, I teamed up with my girlfriends to make the process quicker and more fun! While working together we shared stories from our childhood, laughed at pranks we had pulled off, and learned from each other. Time flew by, and before we knew it, we were able to fill our “dabbas” with traditional Christmas delights.

Do you have your own Christmas cooking family tradition? Anyone out there with a good recipe for kul kuls? Please share, either on my Facebook page or here on my blog.

Karanji is everyone’s favorite, so I’m re-posting this recipe for you. I’ve also included a new simple semolina filling.

Karanji final

Karanji with Semolina (Sooji) Filling
Ingredients:
1 cup fine semolina
1 tablespoon poppy seeds/khus khus, (optional)
1 cup desiccated coconut, (unsweetened)
1/4 cup finely chopped nuts, (optional)
1/4 cup golden raisins, (optional)
1 cup fine sugar
1/2 tsp cardamom powder, (optional)

Directions:
Place a large wok, over medium-low heat. Add semolina and dry roast. Stir constantly so it does not burn. It is ready when its turns light brown and smells fragrant. Remove from the wok and put it into a large bowl. Dry roast the poppy seeds for two minutes. Add it to the semolina. Next, dry roast the coconut. Stir constantly until it turns light brown and fragrant. Add the roasted coconut, chopped nuts, raisins, sugar, and cardamom powder to the semolina. Mix everything well. Make this filling a day before you make the karanjis.

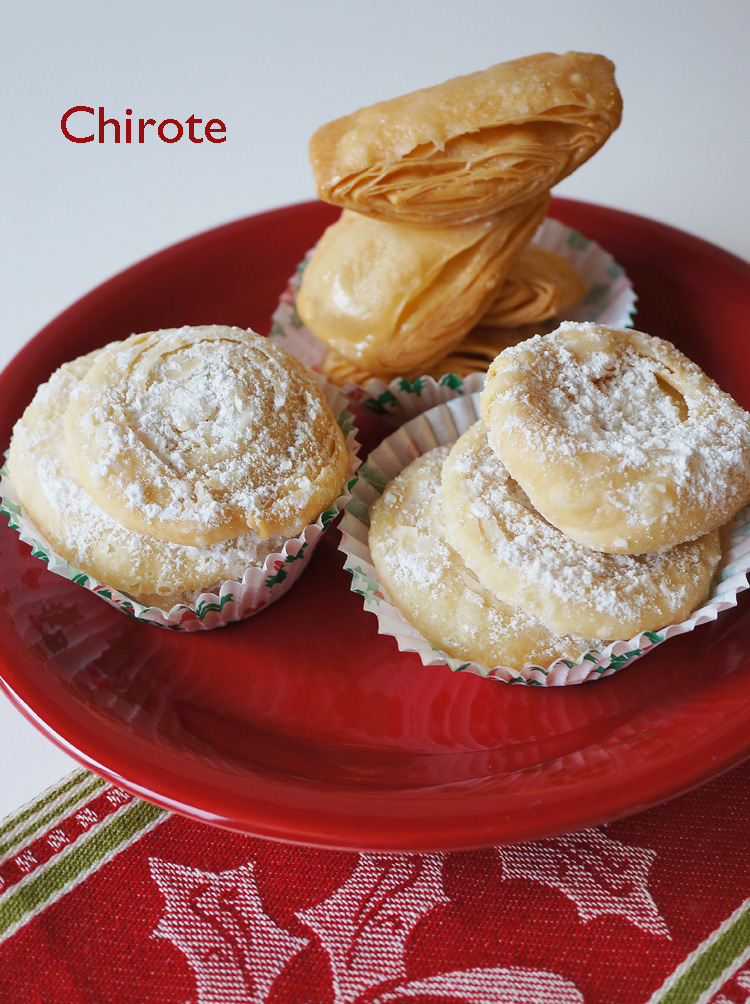
Chirote – Flaky Indian pastry

Chirote2
It’s time to give thanks, celebrate, and reminisce. While I was growing up, making Indian sweets, cookies, cakes, and pastries during Christmas was a family affair. It was part of our celebration. Each one of us had a specific task to do in the kitchen. Making the different fillings, kneading the dough, rolling, cutting, frying or baking – whatever it was, the whole family participated. Being the youngest in the family, I got to do the fun parts, like putting raisins in karanjis. I would put two raisins in one karanji and one in my mouth. Needless to say, I was fired from that job!

Too many of these traditions are forgotten these days. My own children don’t know how to make these delicacies. So, before these recipes are completely lost, I want to share them with you. Chirote (also spelled Chiroti) is a popular dessert from Maharashtra and Karnataka. It is a crisp, flaky, deep-fried pastry. The pastry is dipped in a sugar syrup or dusted with confectioners’ sugar. Half a teaspoon of rose water added a touch of elegance to the sugar syrup that I made.

I know that this recipe is long and it looks scary! But one way to tackle it, is to gather some of your friends and you could make them together. I’d love to know what special treats you plan to make for your families this Christmas. Please share them with me, here on my blog or on the MargaretsHome Facebook page. Thank you.

Chirote
Prep time: 1 hour (does not include time to rest dough)
Cooking time: 30 min
Makes: 20

Ingredients:
For the dough
2 cups all-purpose flour, plus 1 cup flour for dusting
3 tablespoons ghee or unsalted butter, melted
1/8 teaspoon salt
water (I used about ¾ cups)

For the rose syrup
1 cup granulated sugar
1 cup water
3 teaspoons lemon juice
½ teaspoon rose water

For the spread
2 tablespoons ghee/butter, melted
2 tablespoons rice flour

For dusting
¼ cup confectioners’ sugar
Use this to dust half the chirotes after you make them.

Directions:
For the dough
Add flour and salt into a large mixing bowl. Stir with a whisk. Make a well in the center and add melted ghee. Add a few tablespoons of water at a time and mix until the dough comes together. Knead to make a firm dough. Cover the dough with a damp towel and let it rest for one hour. You can also made the dough in a stand mixer. Use the dough hook.

For the rose syrup
In a heavy-bottomed saucepan add sugar and water. Place it over medium-high heat. Stir until the sugar dissolves. Simmer over low heat until the sugar syrup thickens (one-thread consistency), about six minutes. Turn off the heat. Stir in the lemon juice and rose essence.

For the spread
In a small bowl, mix melted ghee and rice flour until creamy. Set aside.
(If you live where it is cold during this time of the year, make this after you make the rotis. Otherwise, it will become solid and you have to put in the microwave to soften it. I know, because it happened to me!)

Put it all together
Divide the dough into six even sized portions. Roll each portion of dough between the palms of both hands, using a circular motion, to make smooth dough balls. Flatten each dough ball slightly and place it on a well floured surface. Dust some flour over it and using a rolling pin, roll it into a thin, round shape (like a roti), about 10 inches in diameter. Place each roti on a large plate or tray and cover them with a damp towel. You can place the rotis one on top of the other as long as you have dusted them with flour.

Place one roti on your work surface, smear with one teaspoon of the spread (rice flour and ghee), right to the edges. Dust with a little flour. Place the second roti over the first and again smear it with a teaspoon of the spread. Dust with flour and then place the third roti and smear it with the spread. Dust with a little flour. Starting at the lower edge, roll into a tight log. Stick the edge with a drop of water. Use a sharp knife and a sawing motion to cut the log into ½ inch pieces. Put the pieces on a plate and cover them with a damp towel. Using the same process, make another log with the remaining three dough balls.

There are two methods of making chirotes. For the first method, take one piece and keep the plain, smooth side up.  Roll lightly with a rolling pin to make a long, 2 inch chirote. For the second method, keep the cut edge up, press gently and roll lightly with a rolling pin, making a circle that is about 2½ inches in diameter. Keep them covered with a damp towel.

To show you, I used one log to make chirote which I dusted with confectioners’ sugar and the other log to make chirote that I dipped in rose syrup.

In a heavy-bottomed pot, heat oil for deep frying, over medium-high heat. Once the oil gets hot, turn the heat to medium. Drop three or four chirotes into the oil and fry them on both sides until they turn golden. Drain on paper towels. Sprinkle half of the chirotes, while they are still warm, with confectioners’ sugar. Drop the other half of the warm chirotes, a few at a time, into the rose syrup. Enjoy.
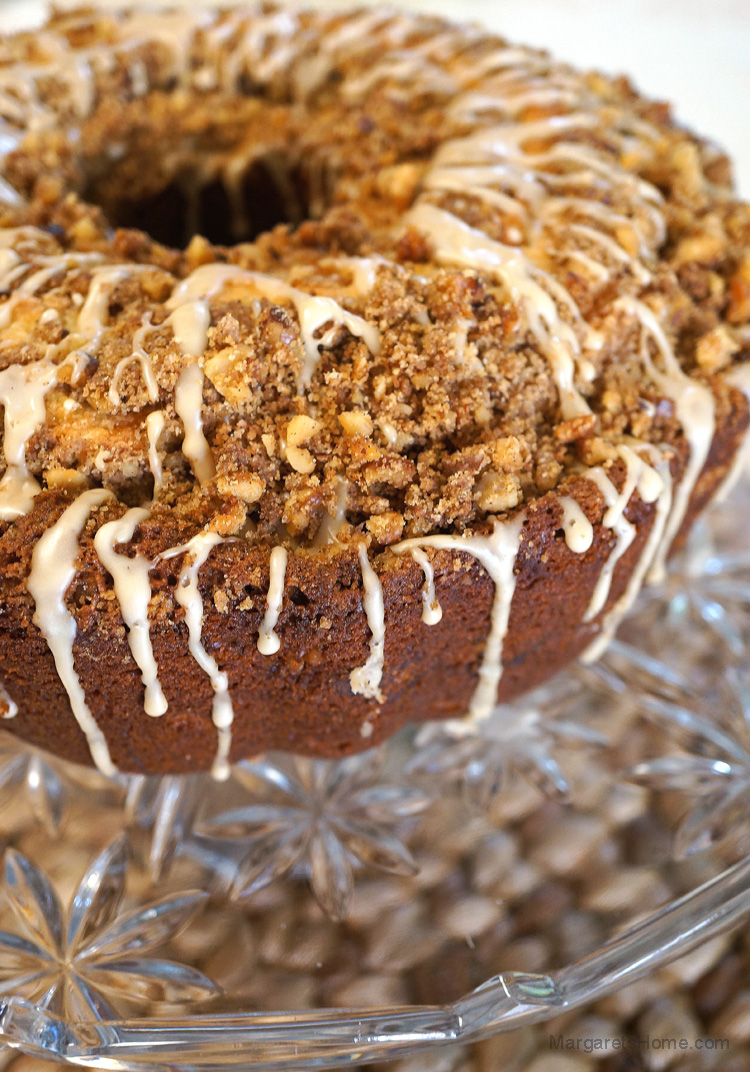
The Barefoot Contessa’s Sour Cream Coffee Cake

Coffee Cake Ina 2

If you’re looking for the perfect coffee cake for brunch – this is it! Ina Garten’s Sour Cream Coffee Cake. It has a light, moist texture with a slight tang from the sour cream. The cinnamon, brown sugar and nut streusel runs through the middle of the cake and also tops it. And, as if that’s not enough, it has a delicious maple glaze that’s easy to make and absolutely yummy.

Be sure to use cake flour because it adds to the light texture of this cake. It also makes a big difference when you have the butter and eggs at room temperature before you get started. I’ve read that there was a typo in her online recipe where it called for 1/4 cup light brown sugar to make the streusel and it should have been 3/4 cup. I kept it at 1/4 cup and it was perfect so I wouldn’t change it. I hope you will enjoy this cake as much as we did.

The Barefoot Contessa’s Sour Cream Coffee Cake
Author: Ina Garten
Total Time:  1 hr 40 min
Prep time:  10 min
Inactive:  30 min
Cook time:  1 hr
Serves:  8-10

Ingredients:
12 tablespoons (1 1/2 sticks) unsalted butter at room temperature
1 1/2 cups granulated sugar
3 extra-large eggs at room temperature
1 1/2 teaspoons pure vanilla extract
1 1/4 cups sour cream
2 1/2 cups cake flour (not self-rising)
2 teaspoons baking powder
1/2 teaspoon baking soda
1/2 teaspoon kosher salt

For the streusel:
1/4 cup light brown sugar, packed
1/2 cup all-purpose flour
1 1/2 teaspoons ground cinnamon
1/4 teaspoon kosher salt
3 tablespoons cold unsalted butter, cut into pieces
3/4 cup chopped walnuts, optional

For the glaze:
1/2 cup confectioners’ sugar
2 tablespoons real maple syrup

Directions
Preheat the oven to 350 degrees F. Grease and flour a 10-inch bundt or tube pan.

Cream the butter and sugar in the bowl of an electric mixer fitted with the paddle attachment for four to five minutes, until light. Add the eggs one at a time. Then add the vanilla and sour cream. In a separate bowl, sift together the flour, baking powder, baking soda, and salt. With the mixer on low, add the flour mixture to the batter until just combined. Finish stirring with a spatula to be sure the batter is completely mixed.

For the streusel, place the brown sugar, flour, cinnamon, salt, and butter in a bowl and pinch together with your fingers until it forms a crumble. Mix in the walnuts, if desired.

Spoon half the batter into the pan and spread it out with a knife. Sprinkle with 3/4 cup streusel. Spoon the rest of the batter in the pan, spread it out, and scatter the remaining streusel on top. Bake for 50 to 60 minutes, until a cake tester comes out clean.

Let cool on a wire rack for at least 30 minutes. Carefully transfer the cake, streusel side up, onto a serving plate. Whisk the confectioners’ sugar and maple syrup together, adding a few drops of water if necessary, to make the glaze runny. Drizzle as much as you like over the cake with a fork or spoon.

Blueberry Cheesecake and Happy Mother’s Day

Blueberry Cheesecake3

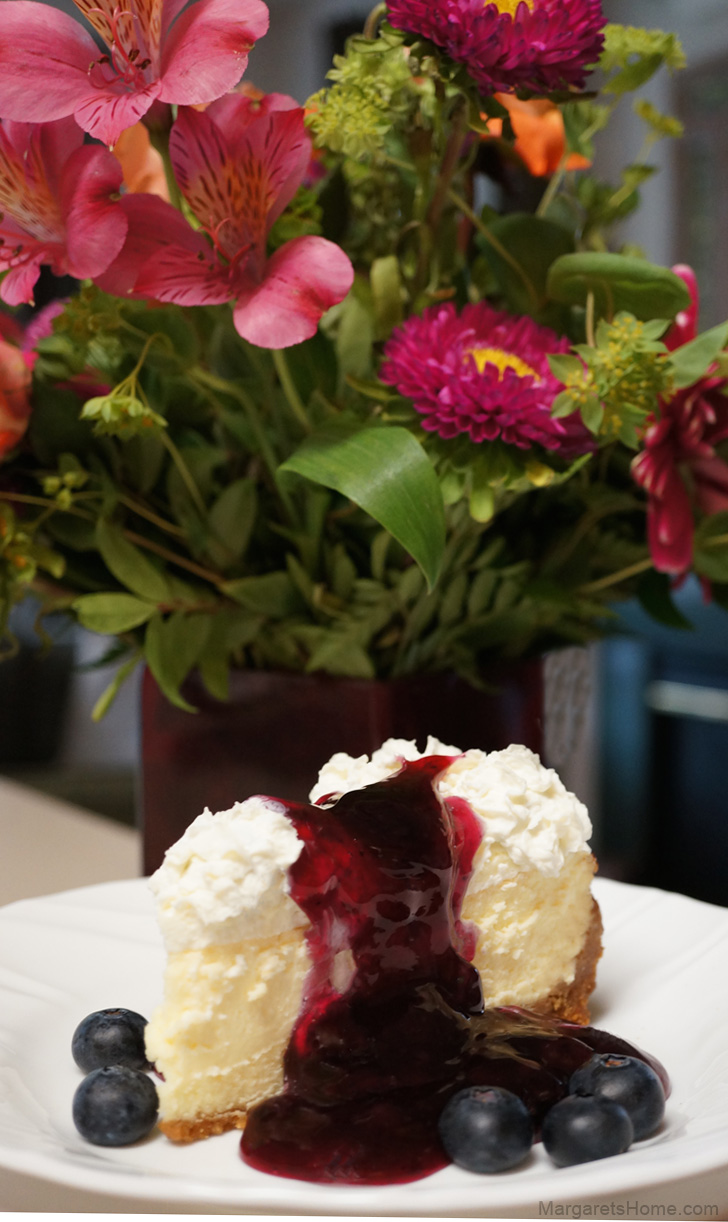
Celebrate Mother’s Day with this luxurious, rich, white chocolate cheesecake with home made blueberry topping. It is definitely worth the time and effort to make this special dessert for your mom.

Blueberry cheesecake has been one of our family favorites for many years. I remember making it for the first time in a 9 by 13 inch pan after tasting it at a restaurant. It was more like a blueberry bar than a cheesecake, but as far as the taste – I couldn’t have been happier. My recipe has evolved since then and it has become decadent with extra calories to go along with it. But Mother’s Day is a good time to have a piece of cheesecake without feeling terribly guilty.

I can’t help but think of my mom while I write this post around Mother’s Day. I have beautiful memories of of her. I remember she used to play catch with me while I ran around a flower bed in my garden. When I think back now, I wonder how she ever found the time to do that while holding a full-time job, cooking every meal, and doing a myriad other tasks that moms have to do. While she made chapatis in the kitchen, she taught me my multiplication tables and spelling. She was strong in her faith and prayed for all her children and grandchildren. We felt protected and loved when we went through difficult times in our lives. Oh, I love her so very much, and wish I could tell her one more time.

Happy Mother’s Day to all the selfless mothers out there. God bless you.

Blueberry Cheesecake
Prep time: 15 minutes
Cook time: 45-50 minutes
Serves: 6-8

Ingredients:
For the crust:

1 cup graham cracker crumbs
½ cup almond flour
2 tablespoons sugar
¼ cup butter, melted

For the topping:
2 cups fresh blueberries
⅓ cup sugar
⅓ cup water plus 2 tablespoons water
2 tablespoons cornstarch
2 tablespoons fresh lemon juice
½ teaspoon vanilla extract

For the filling:

2 packages (8 oz. each) cream cheese, softened
½ cup sugar
2 eggs
1 egg yolk
1 cup white chocolate chips, melted
1 teaspoon vanilla extract

Directions:
Preheat your oven to 350 degrees F. Line the bottom of an eight-inch springform pan with parchment paper.

To make the crust: In a bowl mix graham cracker crumbs, almond flour, sugar and butter. Press onto bottom of the springform pan. Bake for six minutes. Cool completely.

To make the topping: In a saucepan over medium heat, combine the blueberries, sugar and one-third cup of water. Stir frequently, and bring to a boil.

In a small bowl, mix the cornstarch with two tablespoons of cold water. Slowly stir the cornstarch mixture into the blueberries. Simmer until the blueberry topping is thick enough to coat the back of a metal spoon, about five minutes. Remove from heat and gently stir in lemon juice and vanilla. Cool and refrigerate until you are ready to serve the cheesecake.

To make the filling: Beat cream cheese and sugar in large bowl with mixer until creamy.  Add eggs and yolk, one at a time, mixing on low after each just until blended. Add melted white chocolate and vanilla and beat until mixture is smooth. Pour over the crust and bake for 45-50 minutes. Cool completely, run a butter knife gently around the edge of the pan, and refrigerate for four hours or over-night.

Serve slices of cheesecake with whipped cream and blueberry topping.

Raisin, Apricot and Cranberry Scones

Raisin, Apricot and Cranberry Scones10

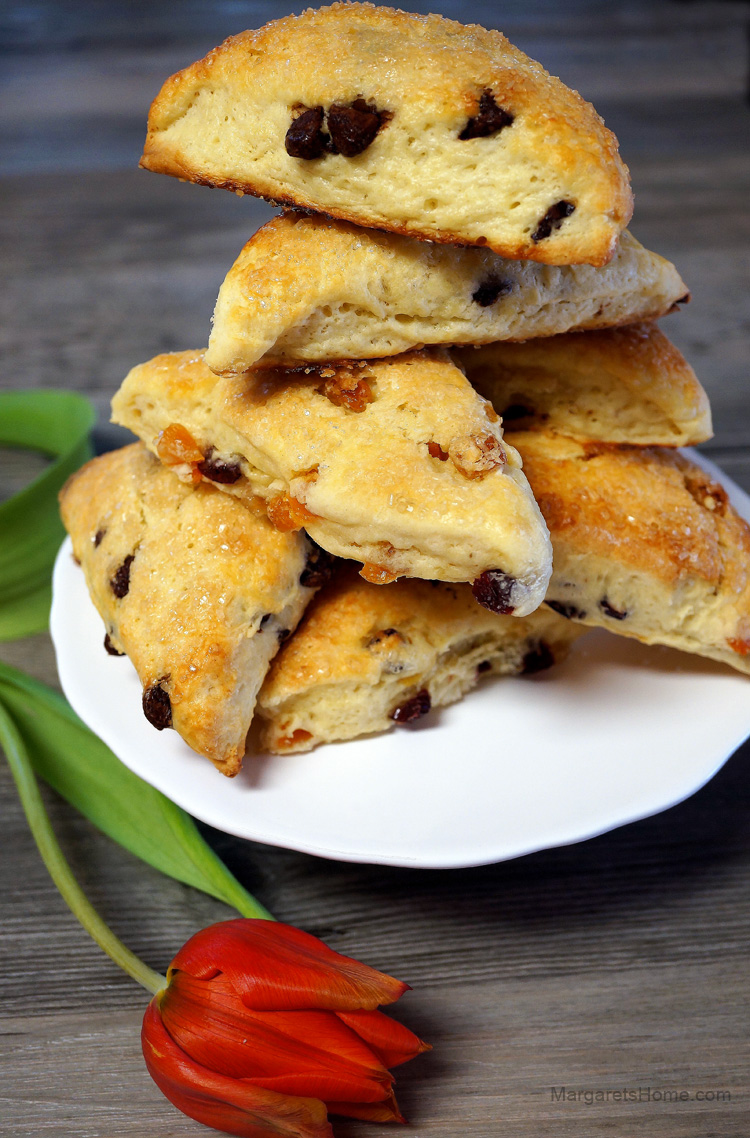
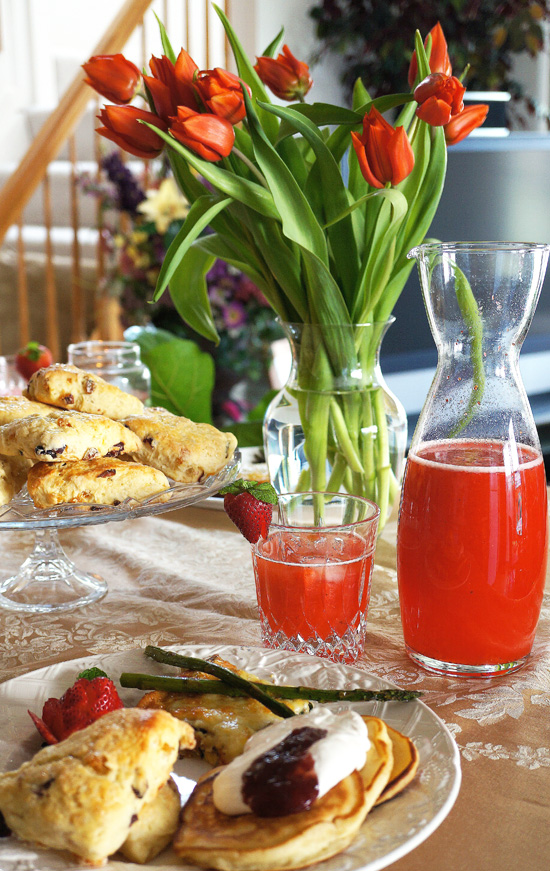
Start your Sunday morning with these freshly baked raisin, apricot, and cranberry scones. I made them for my family this past Sunday and they really enjoyed them. We topped them with cream and homemade strawberry jam. My favorite thing about making scones is that there is such a wide variety to choose from. You can make them with dried fruit or fresh fruit. You can make them sweet, nutty, or savory. In the picture above, you can see both raisin, apricot and cranberry scones on the bottom and chocolate chips scones on top. British scones are lightly sweetened so when I first made them, I added very little sugar. I’ve since changed my recipe and added two tablespoons of sugar to please my children. You can adjust the amount of sugar to suit your taste buds.

Here are some tips to making light and airy scones. Make sure that your butter is very cold but not frozen. Sift the dry ingredients to aerate the flour. Work quickly and lightly when combining the wet and dry ingredients. Don’t over handle the dough as this will make your scones tough. Use very little flour to roll and shape your dough. Cut your scones with a sharp knife or cutter. Place them close together on the tray as this will help to keep their edges straight. Bake them on the top rack of your oven. Keep these tips in mind when you make scones and I promise your scones will be perfect.

Raisin, Apricot and Cranberry Scones
Prep time: 15 minutes
Cook time: 25 minutes
Makes: 18 scones

Ingredients:
3 cups all-purpose flour, (or use cake flour)
1 tablespoon + 1 teaspoon baking powder
½ teaspoon salt
2 tablespoons granulated sugar, (0-2 tablespoons, depending on your taste and preference)
10 tablespoons cold butter, (diced into small cubes)
1 cup dried fruits, (raisins, diced apricot, cranberries)
2 eggs
1 cup buttermilk + 2 tablespoons, (reserve 2 tablespoons to brush tops)
Turbinado sugar for tops

Directions:
Preheat oven to 400 degrees F. Line a sheet pan with parchment paper. Set aside.

In a large bowl sift flour, baking powder, and salt. Using a pastry cutter, a fork and a knife, or your fingertips, work the butter into the flour until it resembles coarse breadcrumbs. Sprinkle sugar over the flour, add the dried fruits and toss to combine.

Shake the carton of buttermilk before you measure. Pour one cup buttermilk into a separate small bowl. Add the eggs and whisk until combined.

Make a well in the center of the dry ingredients and slowly add the egg and buttermilk mixture. Gently fold the wet and dry ingredients, using a flat bladed knife, until a dough forms. The mixture simply needs to be pulled together until the flour is incorporated. The dough will be slightly wet, light, and pliable.

Turn the dough out onto a floured surface. Flour your hands and using a very light touch, gently pat into shape. About three to four pats only. Shape the dough into an 8 x 8 inch square that is about half inch in height. Use a ruler or a large knife to straighten the edges. Cut into thirds. You will have nine squares. Then cut each square diagonally to make two triangles.

Place the scones close together on the parchment lined baking sheet. Brush the tops with the reserved two tablespoons of buttermilk and sprinkle with Turbinado sugar. Bake on the top rack of the oven for 15 minutes, or until the tops turn light golden in color. Scones are best served warm and fresh, with jam and cream or creme fraiche.

More tips:
– For lighter scones use cake flour, which is soft flour that has less gluten protein. You can make your own cake flour. For every one cup of all purpose flour, take out two tablespoons and replace with two tablespoons of cornflour. Sift using a sieve.

– For chocolate chip scones, you can replace the dried fruit with one cup of chocolate chips.
Easter Brunch 3

Molten Chocolate Cake – Happy Valentine’s Day!

Molten Chocolate Cake3

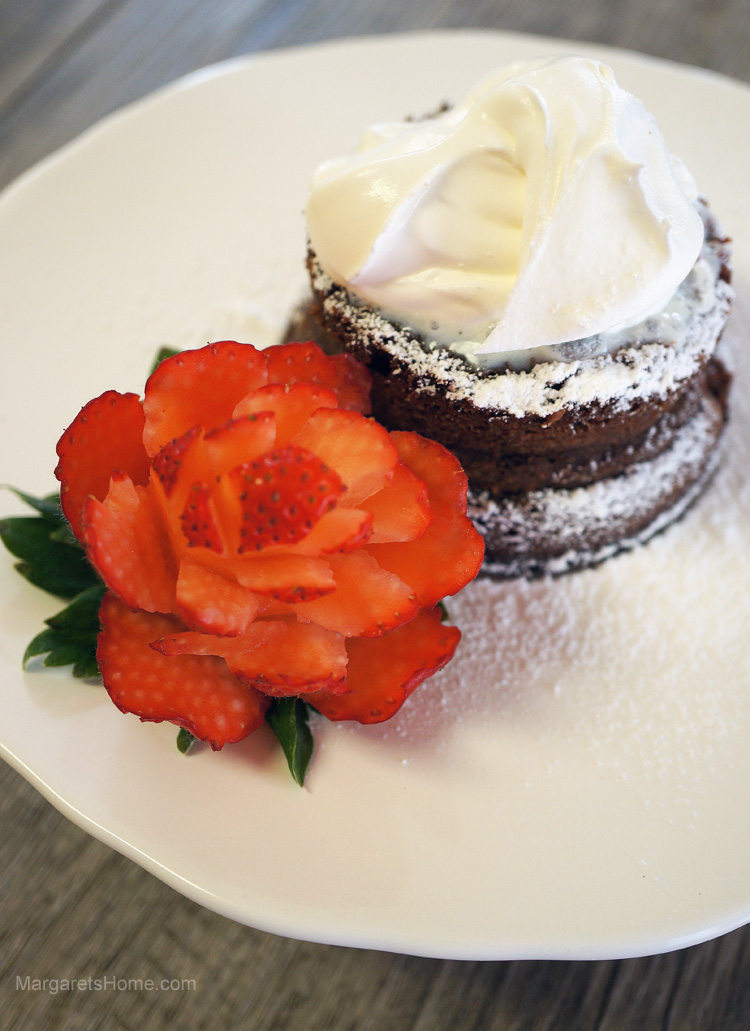
Happy Valentine’s Day! Bake this easy, decadent Molten Chocolate Cake and you’re bound to impress your sweetheart. This cake has several names – chocolate fondant pudding, chocolate lava cake, and chocolate moelleux. The French call it chocolate mi-cuit (semi-cooked) which, I think, perfectly describes this cake.

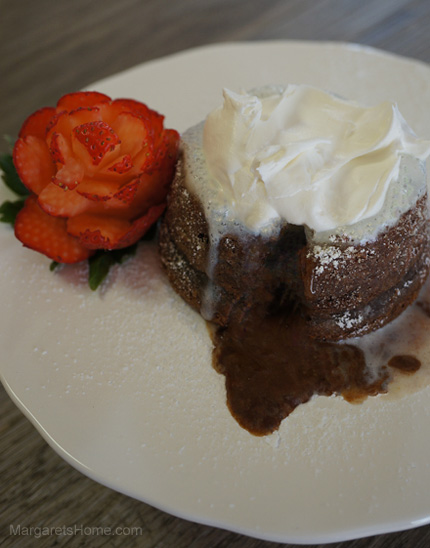
The molten chocolate cake was born out of a chocolate accident in the kitchen when its creator master chef Jean-Georges Vongerichten pulled an under-baked cake out of the oven. Served right out of the oven, these individual sized chocolate cakes release their ooey-gooey melted chocolate centers with your first bite. With a scoop of ice-cream, crème fraîche, or whipped cream it’s the perfect Valentine’s Day treat.

Molten Chocolate Cake
Adapted from Food & Wine by Jean-Georges Vongerichten
Prep time: 15 minutes
Baking time: 12 minutes
Serves: 4

1 stick softened unsalted butter, plus 1 teaspoon melted butter for brushing ramekins
1 cup semi-sweet chocolate chips
2 eggs
2 egg yolks
¼ cup granulated white sugar
Pinch of salt
1 teaspoon vanilla essence
2 tablespoons all-purpose flour, plus 2 teaspoons for dusting ramekins
Confectioners’ sugar for dusting, optional
Whipped cream or ice-cream and strawberries as garnish, optional

Place rack in the center of the oven and preheat to 400 degrees F. Butter and flour four 6-ounce ramekins. Gently tap and remove excess flour and set the ramekins on a baking sheet. You can also use molds, custard cups or even muffin tins instead of ramekins.

In a double boiler, oven simmering water, melt butter with chocolate chips. Stir until the chocolate chips and butter melt and turn smooth. Remove from heat and set aside.

In a medium bowl, beat whole eggs, the two yolks, sugar, and salt with a hand mixer, on high speed, for about four minutes or until the mixture turns thick and pale in color. Add the vanilla essence and beat just until it is incorporated. Using a spatula gently fold the chocolate mixture and flour into the egg mixture.

Spoon the batter into the prepared ramekins and bake for 12 minutes, or until the sides of the cake are firm but the centers are still wobbly and soft. Let the cake cool in the ramekins for one minute. You can serve the cakes in their ramekins or you can run a knife around the edge of each cake and then invert them onto serving plates. Gently remove the ramekins. Sprinkle the tops of each warm cake with confectioners’ sugar and serve with a dollop of whipped cream or ice cream. I’ve decorated my cake with a beautifully carved strawberry rose.

Note:
I used Ghirardelli premium baking semi-sweet chocolate chips.
– You can make the batter several hours in advance. Butter and flour your ramekins, pour the batter, cover with plastic wrap, and refrigerate until you are ready to bake. Bring to room temperature before you bake.
– Oven temperatures vary so check the cake after they have been in the oven for 10 minutes. The sides should be set but the centers should be wobbly and soft. This is important to get the perfect molten chocolate cake. It took 12 minutes in my oven.

Molten Chocolate Cake4

Raghavdas Ladoo – Semolina Ladoo

Sooji Ladoos3

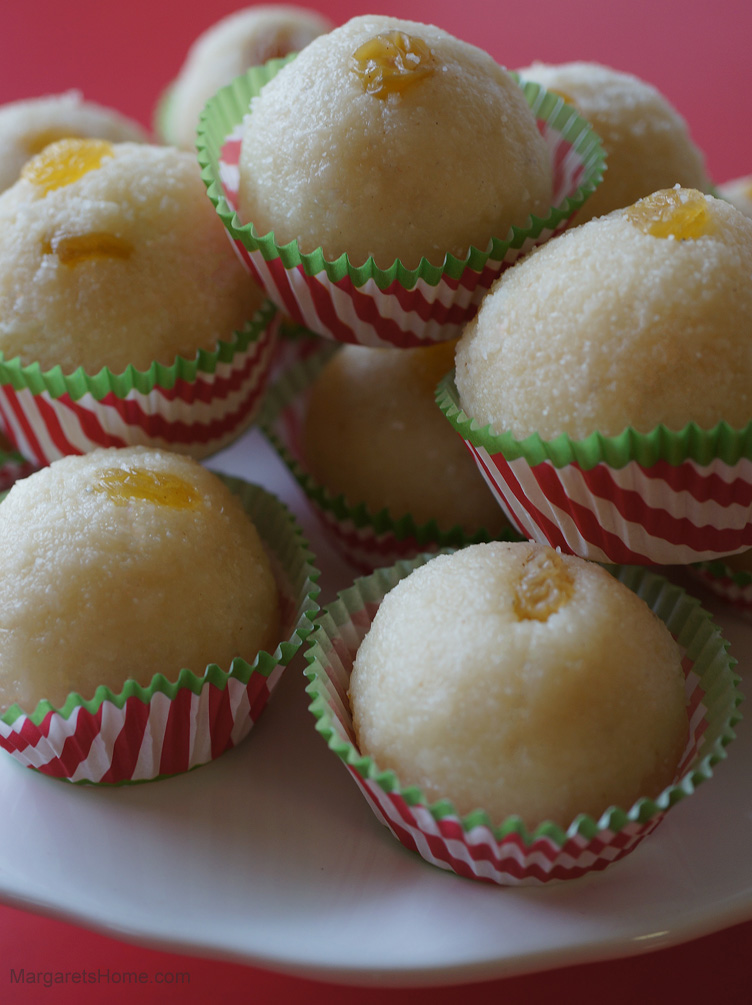
Happy Holidays to all my readers and Facebook friends! I love the month of December. It’s a month of lights, snow, parties, baking, and making Indian sweets and goodies to share with family and friends. Here is an easy recipe for Raghavdas Ladoo to add to your collection. They are made out of semolina and desiccated coconut.

Last year I shared recipes for Doughnuts, Karanjis, Almond Brittle, Rose Cookies, and Namkeen. I hope you used those recipes to make your celebrations a sweet success this year.

Raghavdas Ladoos
Prep time: 20 minutes
Cooking time: 10 minutes
Makes: 25 ladoos

1 cup desiccated coconut, (or coconut powder)
2 cups fine semolina
½ cup ghee
3 tablespoons golden raisins
½ teaspoon green cardamom powder
1 cup sugar
½ cup water

Dry roast the desiccated coconut in a wok, over medium-low heat. Roast until it begins to turn light golden in color, remove from heat and transfer it to a bowl. Make sure that the coconut doesn’t turn brown.

Let the wok cool down and then wipe it clean with a paper towel. Heat the wok over medium heat. Add ghee and the semolina. Cook till light pinkish and fragrant. You don’t want the semolina to turn brown. Remove from heat and add coconut, two tablespoon of raisins, and the cardamom powder. Mix well. Keep the rest of the raisins to decorate the ladoos.

Place a non-stick pan on medium heat. Add sugar and water and cook until it turns to a syrup of one-thread consistency. You have to watch and test the syrup frequently. Turn off the heat and pour the hot syrup into the wok with the semolina, coconut and cardamom powder. Mix well. Cover with a lid and let it rest for 15 minutes. The semolina will cook and the mixture will cool down. If it hardens, don’t panic, just sprinkle a tablespoon or two of hot water over the mixture.

Start making the ladoos while the mixture is still warm. Grease your palms with a little ghee. Take a lemon size portion of the mixture and shape them into ladoos. Garnish each ladoo with a raisin. As you make them, line them in a tray and let them cool. You can go back and make them perfectly round. Cool completely before you store them in an air tight container. They are fun and easy to make.

Boondi Ladoo

Boondi Ladoo2

Happy Diwali to my readers and friends who celebrate the Indian Festival of Lights. May the new year bring you and your family prosperity, good health, and happiness.

When I walked into my local Indian grocery store the shelves were full of Indian sweets. My mouth was watering and memories of my time in India flooded my mind. I remember oil lamps on the porch of almost every home, firecrackers lighting the skies, children dressed is new outfits, neighbors sharing sweets with each other, and the aroma of wonderful sweets being prepared wafting in the air. Right then I decided to make boondi ladoos and bought all the ingredients I needed and headed for my kitchen.

Boondi ladoos are not the easiest to make but if you have patience, pay close attention to the measurements of the ingredients, read the instructions and notes carefully, you too can make boondi ladoos that you can enjoy and share with your friends. You will also need a boondi maker (to make the small balls, which are called boondi in Hindi, that collectively make each ladoo) or a skimmer – a flat ladle with holes in it to make the boondi. The Indian grocery stores in the U.S. carry it. I added a twist to the fragrance and taste of these boondi ladoos with orange blossom water and red rose water. I hope you will enjoy my version of boondi ladoo.

Boondi Ladoo
Prep time: 15 minutes
Cooking time: 35 minutes
Makes: 20

For the boondi:
2 cups Bengal gram flour, (besan)
1 pinch of baking soda
1 pinch salt
1 pinch of orange food color powder, (optional)
1¼ cups water
Oil for deep frying
2 tablespoons lightly roasted melon seeds
1 tablespoon chopped pistachios

For the syrup:
2 cups sugar
1½ cups water
2 pinches of orange food color powder, (optional)
1 teaspoon orange blossom water
1 teaspoon red rose water
1 teaspoon of cardamom powder, (optional)

Sift gram flour, baking soda, salt and food color into a large bowl. Add half the water and mix with a wooden spoon. Add the rest of the water a little at a time and stir until the batter is smooth. The batter is the right consistency when it drops through the holes of the skimmer easily. Let the batter rest while you make the syrup.

In a large pan combine sugar and water and boil for 15 minutes over medium heat. Brush the sides of the pan with water as it is boiling, so that the sugar does not crystallize and use a candy thermometer. The syrup is ready when the thermometer reads 220 F. Another way to check whether the syrup is ready, if you don’t have a candy thermometer, is when you touch a drop of cooled syrup between your forefinger and thumb, a thin string is formed. Turn off the heat. Add food color, orange blossom water, rose water, and cardamom powder. Add the melon seeds and stir well.

Heat oil in a wok to 350 F. Pour a small amount of batter on the skimmer and tiny droplets of the batter will fall through the holes in the skimmer, into the oil, and form boondis. Hold the skimmer about two inches from the oil to form round boondis. Of course, you need to be careful when you do this. As soon as the bubbles stop forming around the boondis (the boondis should not be crisp and turn brown) drain the oil with a slotted ladle and put them into the syrup. Stir them every time you put a new batch of boondis into the syrup.

Mix until all the boondi and melon seeds are well coated with syrup. When the mixture is cool enough to handle make ladoos. Garnish with chopped pistachios.

Notes:
– If the batter is too thick the boondi will be flat. Add a few drops of water at a time to get the batter to the right consistency so the boondis will be round.
– Hold the skimmer about two inches from the oil, otherwise your boondi will have tails.
– You will see black specks on the ladoos if you add cardamom powder. So you can avoid that by just using the orange blossom water and red rose water.
– Start making the ladoos as soon as possible. If you let the mixture get cold you will not be able to form ladoos.
– You can also put the boondi and syrup mixture into the bowl of a stand mixer with a paddle and run it for about five minutes. If the mixture does not come together to form a ball, add 5-6 tablespoon of boiling hot water, while the mixer is on and run it for another five minutes.