Quinoa comes in a rainbow of colors. You can even find a packaged blend in rainbow colors. When cooked, each color is slightly different from the other in texture and flavor. I find white quinoa is the best substitute for rice and it cooks a little faster than the others.
Red quinoa, in today’s recipe, works really well because it has a rich nutty flavor and a slightly chewy texture. Check the package to see if the quinoa is pre-washed. If not, wash the quinoa in several changes of water to remove the bitter outer coating, before cooking. You can buy quinoa at Wegmans or Trader Joe’s. You can also purchase it on line from Amazon.
What’s your favorite way to eat quinoa? Please share your comments on my blog or on my Facebook page.
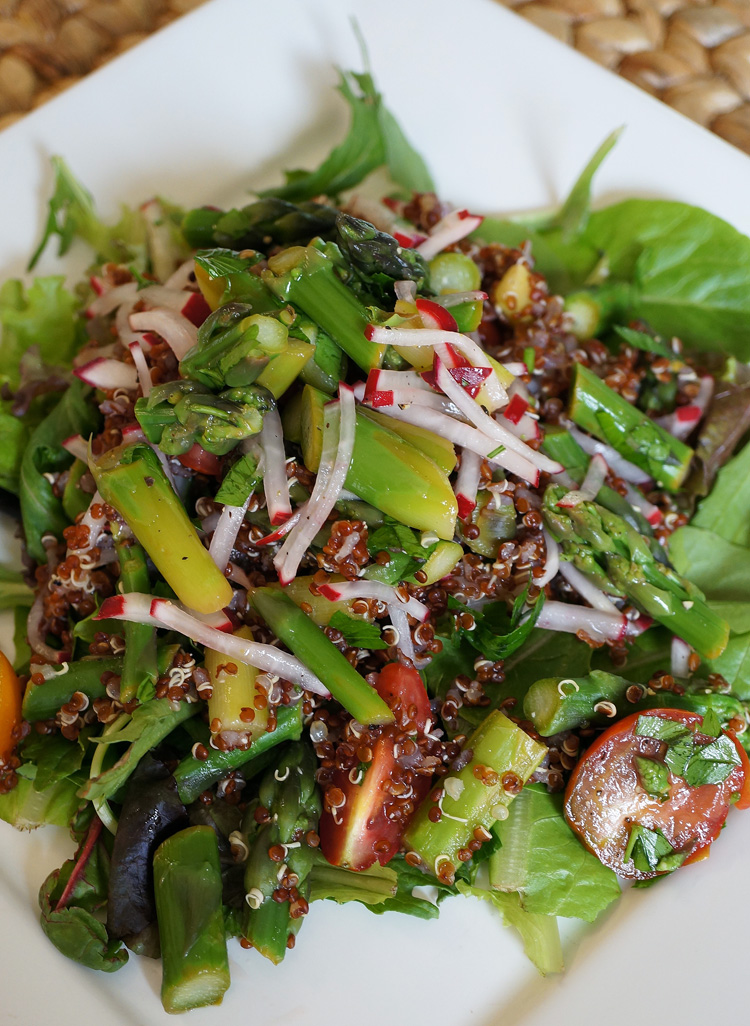
Red Quinoa and Asparagus Salad
Prep time: 20 minutes
Cooking time: 20 minutes
Serves: 4-6
1 cup red quinoa
2 cups chicken or vegetable stock
1 bunch asparagus, (about one pound)
5 radishes, cut into matchsticks
1 cup cherry tomatoes, halved
2 tablespoons finely minced parsley
1 lemon
salt and pepper to taste
5 oz (142 g) sweet baby lettuce (or lettuce of your choice)
Cut the asparagus on bias into 1-inch pieces. Blanch the asparagus in a pot of salted, boiling water, for three minutes. Drop into an ice bath to stop the cooking. Drain and set aside.
Wash the quinoa in a sieve under running water, until the water runs clear. Drain. Add the quinoa and stock into a medium saucepan. Bring to a boil over medium-high heat. Turn the heat to the lowest point, cover with a lid and let it cook for 20 minutes. Cool.
Juice and zest the lemon and add to a large bowl. Add asparagus, radish, tomatoes, parsley, salt, and pepper. Add the quinoa and toss to combine. Chill for five minutes.
Put a large handful of baby lettuce on a plate and top with the red quinoa and asparagus salad. No dressing required.