Reposting – Red Kidney Bean Curry (Rajma curry)

Red Kidney Bean Curry3Red Kidney Bean Curry
Prep time: 8 minutes
Cooking time: 25 minutes
Serves: 4

Ingredients:
1lb 13 oz (822 grams) red kidney beans
3 tablespoons vegetable oil
1 bay leaf, (tej patta)
2 black cardamoms
1-inch piece cinnamon
2 cups finely chopped onion
salt
2 tablespoons ginger-garlic paste
2 cups diced tomatoes
3 green chillies, (slit down the center – adjust depending on heat and your preference)
1 teaspoon whole cumin seeds
½ teaspoon turmeric powder
2 teaspoons Kashmiri chilli powder, (depending on heat and your preference)
1 teaspoon crushed red chilli flakes, (depending on heat and your preference)
1 tablespoon coriander powder
2 teaspoons garam masala, (depending on your preference)
3 teaspoons kasori methi, (crushed in your palm)
1 cup warm water
¼ cup finely chopped cilantro
3-4 mint leaves, (torn into bits)

Directions:
Heat a heavy bottomed pot on medium-high heat. Add oil and when it shimmers add the bay leaf, black cardamoms, and cinnamon. After 30 seconds add the chopped onion and salt. Fry until the onion turns light brown. Lower the heat to medium and add the ginger-garlic paste. Fry until the raw smell of ginger-garlic disappears, then add the tomatoes and green chillies. Cook until you see the oil separate from the tomato-onion mixture.

Add cumin seeds, turmeric powder, chilli powder, crushed red chilli flakes, coriander powder, garam masala powder, and kasori methi. Cook for 30 seconds and then add the canned red kidney beans along with the liquid in the can and one cup of warm water. Turn the heat to high and let the beans come to a boil. Once it comes to a boil, turn the heat to low, and let the beans simmer for 15-20 minutes. Garnish with cilantro and mint. Serve with plain steamed rice or rotis.

Khana – Restaurant Review

khana_logoMy son, daughter-in-law, and I recently visited Khana restaurant in Burtonsville, Maryland. The restaurant serves Indian food in a casual and bright ambience. I recommend it for a quick evening dinner or a grab ’n go lunch.

Khana gets high marks for service. As we walked in, we were greeted by none other than one of the owners! The restaurant seems to cater to customers with mild palettes. However, we were offered the option to bump up the spice level. I enjoyed the tandoori dishes which offered a surprisingly pleasant, smoky flavor – reminding me of great tandoors in India.

Khana5The menu itself is as intuitive as a fast food chain. Simply select a kabab, wrap, curry, biryani or salad. Vegetarian and non-vegetarian options are available for each. The restaurant also offers a variety of sliders. Very creative! Most dishes are accompanied by rice, naan, and a salad. The naan was my favorite – so good that I ordered extra! You’ll probably do the same!

Khana’s slogan is “Indian food, simplified.” I think it describes my experience perfectly. I recommend you visit Khana if you’re in the Burtonsville area.

Khana
15616 Columbia Pike
Burtonsville
301-421-1244

www.khanagrille.com
Sunday – Thursday 11 am – 9 pm
Friday   – Saturday  11 am – 10 pm
Prices: $5.99 – $10.99
Other: Wheelchair accessible; lots of parking available

Black Chickpea Curry

Black Chickpea Curry1
The classic combination of puttu, kadala curry (black chickpea curry), and papadam is made for breakfast in most homes in Kerala. When I’m homesick, it’s my comfort food. Unlikely as the combination may sound, it actually works. Check out my post on, “Puttu, Pazham, and Pappadam” to learn how to make puttu.

In Kerala, black chickpea curry accompanies puttu, appam, idiyappam, and dosa. But it can also be served with rice, chapati, and puri. You can make it with or without gravy. Black chickpeas are called kala channa in Hindi.

Using garam masala is key. It adds flavor and spice to this curry. The feedback that I received on the garam masala recipe that I shared with you is excellent. Take the time to make it and use it in my recipes. It’s the best!

Black chickpeas are a good source of protein, low in fat, high in dietary fiber, and rich in vitamins and minerals. So, add them to your diet, especially if you are vegetarian or vegan.

Black Chickpea Curry
Prep Time: 20 minutes + soak the chickpeas overnight (8-9 hours)
Cooking time : 30 minutes
Serves : 4

Ingredients:
1 cup black chickpeas (kala channa/kadala), soaked overnight
1 teaspoon coconut oil
4 tablespoons coriander seeds
2 South Indian dry red chillies (depending on heat and your preference, optional)
½ cup grated coconut
¼ cup diced shallots
2 teaspoons sliced garlic
1 sprig curry leaves
½ teaspoon cumin seeds
¼ teaspoon turmeric powder
1 teaspoon garam masala powder, (depending on heat and your preference, optional)

To season the black chickpea curry
3 tablespoons coconut oil
½ teaspoon black mustard seeds
1 sprig curry leaves
2 tablespoons diced shallots

Directions:
Rinse the black chickpeas in several changes of water. Add half teaspoon salt to 2½ cups of water and soak the chickpeas for 8-9 hours or overnight.

Heat one teaspoon oil in a small pan set over medium-low heat. Add coriander seeds and when they begin to turn light brown add the dry red chillies. Roast until coriander turns golden brown. Remove to a small plate. To the same pan add coconut. Roast the coconut, stirring constantly, until the coconut turns golden brown. Off the heat and add quarter cup shallots, two teaspoons garlic, curry leaves, cumin, turmeric, and garam masala. Mix and let it remain on the stove top until it cools. Once all the ingredients that were roasted have cooled, put them into a blender and grind with three tablespoons of water to make a smooth paste.

Add the black chickpeas, along with the water it was soaking in, to a pressure cooker. Add another two cups of fresh water and the ground coconut paste. Stir well. Cover with lid. Bring to full cooking pressure on maximum heat. Reduce heat to medium and cook for eight minutes. Allow the cooker to cool gradually before opening. Please check on the cooking time for your make of pressure cooker.

To season the black chickpea curry, heat three tablespoons of coconut oil in a small pan. Add mustard seeds and when they splutter, add curry leaves and shallots. Keep stirring until the shallots turn golden brown. Add the seasoning to the cooked black chickpea curry. Stir well and serve. If you want a thick gravy, cook the water down on high heat until the gravy thickens and reaches the consistency you desire.

Kale and Red Lentil Soup

Kale SoupMy inspiration for today’s recipe was a spice rack that I got for Christmas. Thank you, Sonia, for this beautiful gift. The 20-jar revolving spice rack has dry herbs and spices that are of the highest quality. I used rosemary and thyme in my soup today. If you don’t own a spice rack, I recommend that you get one. Having spices and herbs at your fingertips is a time saver in the kitchen.

My love for kale is no secret and I’m using it in the soup of the day. Kale has been a very popular vegetable recently. Doctors have named it one of the world’s healthiest foods. Kale has antioxidant-related health benefits, anti-inflammatory health benefits, and cancer-preventive benefits. It also provides cardiovascular support, controls blood glucose levels, improves bone health, and helps lower blood pressure and cholesterol.

I also used red lentils (masoor dal) in the soup. You can find red lentils at your regular grocery store or at the Indian grocery store. I used the split red lentils instead of the whole red lentils, because they cook faster. Take the time and effort to wash the kale well. If the stems on the kale are tough, remove them and use only the leaves. You can use some of the tender stems, but cut them into small pieces.

My family enjoyed this soup a lot and I hope you will too.

Kale and Lentil Soup
Prep time: 10 minutes
Cooking time: 35 minutes
Serves: 4

Ingredients:
3 tablespoons olive oil
1 cup chopped onion
2 teaspoons sliced garlic
¼ teaspoon turmeric
½ cup split red lentils, (masoor dal)
2 cups water
1 can (14.5 oz 411 g) diced Tomatoes
1 can (15.5 oz 439 g) Goya small red beans
½ teaspoon dried rosemary
½ teaspoon dried thyme
½ teaspoon crushed red pepper flakes, (optional)
½ teaspoon fresh ground black pepper
salt
7 cups low-sodium stock, (vegetable or chicken)
4 cups kale
3 tablespoons grated Parmigiano-Reggiano (optional)

Directions:
De-stem the kale by pulling the leaves away from the stem. Wash the leaves and tear (or cut) them into small bite size pieces. If you use the tender stem, cut them into small pieces. Set aside.

Heat olive oil in a large saucepan set over medium heat. Add onion and garlic. Stir and when they turn translucent, add turmeric and lentils. Stir and cook for a minute. Add two cups of water. Bring the water to a boil, then turn the heat to low. Partially cover the saucepan with a lid and let it cook for 20 minutes. The lentils should be well cooked before you add the rest of the ingredients.

Add the tomatoes, red beans, rosemary, thyme, red pepper flakes, pepper, salt, and vegetable stock. Turn the heat to high and bring to a boil. Add the kale, turn the heat to medium-low, and let the soup simmer for ten minutes. Serve in soup bowls and garnish with grated Parmigiano-Reggiano.

Ultimate Banana Bread

Banana Bread7
Overripe bananas are never a pretty sight in the kitchen. I’ve used them to make banana bread, banana fritters, banana pancakes, banana muffins, and even an occasional banana flambé. I bet you have your own “banana rescue mission” recipes.

I had six very ripe bananas, the exact number called for in the Cook’s Illustrated recipe, sitting on my counter. We were snowed in, and although the recipe had a few extra steps, I decided to try it. The verdict: I’m tossing out all my other banana bread recipes and keeping this one!

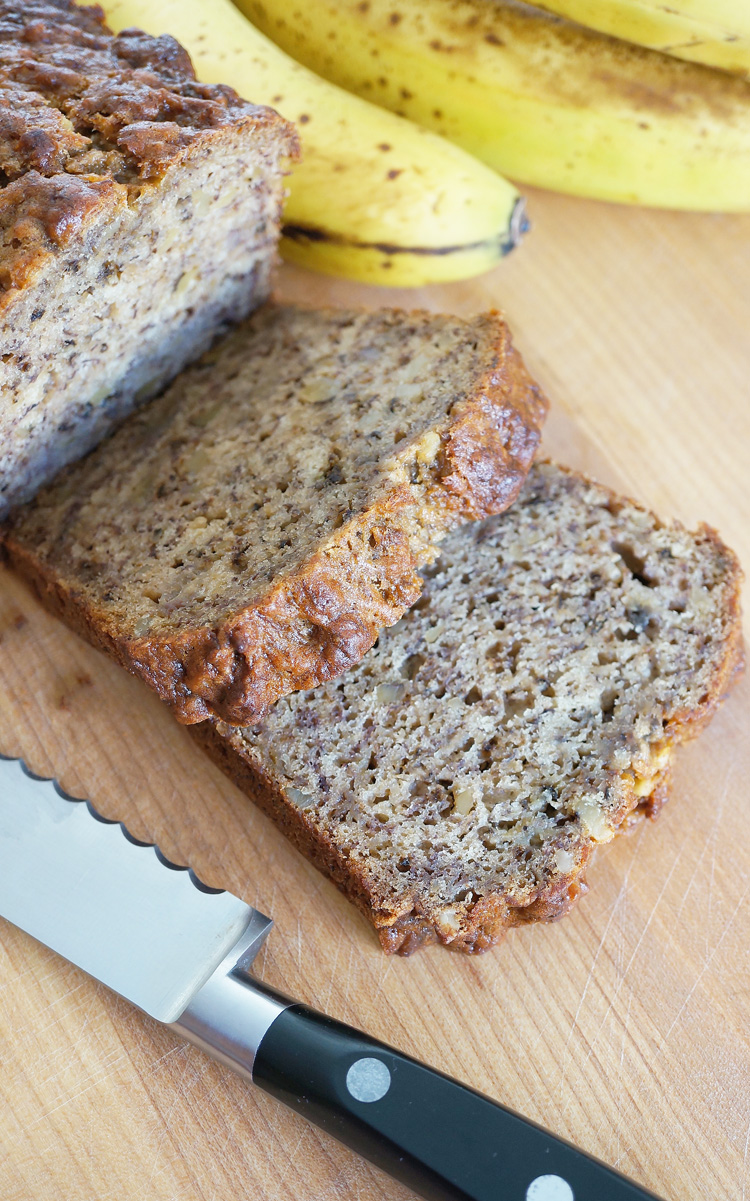
The method used to incorporate more banana flavor into the banana bread, without adding all their moisture, is brilliant. The secret is to use really ripe bananas for this recipe. I didn’t add the thinly shingled banana slices and the extra sugar on top. I loved the cake-like texture and the fact that it didn’t crumble when cut into slices. It was rich, moist, and truly the best banana bread I’ve ever eaten.

Ultimate Banana Bread
(Recipe from Cook’s Illustrated)

Total Time:  1 hr 20 min
Prep time:  20 min
Cook time:  60 min
Yield:  1 loaf (about 12 slices)

Ingredients:
1¾ cups (8¾ ounces) all-purpose flour
½ tsp table salt
1 tsp baking soda
6 large very ripe bananas (about 2¼ pounds), peeled and cut in half
2 large eggs
¾ cup (5¼ ounces) packed light brown sugar
8 tbsps (1 stick) unsalted butter, melted and slightly cooled
1 tsp vanilla extract
½ cup walnuts, toasted and coarsely chopped, (optional)
2 tsp granulated sugar

Directions:
Adjust oven rack to middle position and set oven to 350 degrees. Spray 8½ by 4½-inch loaf pan with nonstick cooking spray. Whisk flour, salt, and baking soda together in large bowl.

Place 5 bananas in microwave-safe bowl; cover with plastic wrap and cut several steam vents in plastic with paring knife. Microwave on high power until bananas are soft and have released liquid, about 5 minutes. Transfer bananas to fine-mesh strainer placed over medium bowl and allow to drain, stirring occasionally, about 15 minutes. You should have ½ to ¾ cup liquid.

Transfer liquid to medium saucepan and cook over medium-high heat until reduced to ¼ cup, about 5 minutes. Remove pan from heat, stir reduced liquid into bananas, and mash with potato masher until fairly smooth. Whisk in eggs, brown sugar, butter, and vanilla.

Pour banana mixture into flour mixture and stir until just combined with some streaks of flour remaining. Gently fold in walnuts. Scrape batter into prepared pan.

Slice remaining banana diagonally into ¼-inch-thick slices. Shingle banana slices on top of either side of loaf, leaving 1½-inch-wide space down center to ensure even rise. Sprinkle granulated sugar evenly over loaf. (I skipped this step.)

Place in the center of the rack. After 30 minutes turn the loaf around and check the bread for color. If it is browning too quickly, cover loosely with aluminum foil. Bake until toothpick inserted in center of loaf comes out clean, 55 to 75 minutes. Cool bread in pan on wire rack 15 minutes, then remove loaf from pan and continue to cool on wire rack. Serve warm or at room temperature.

Notes:
– Use very ripe bananas.
– Do microwave the bananas so they release their liquid.
– Reduce the liquid to a ¼ cup before adding them back into the bananas.
– I skipped putting the sliced banana on top of the banana bread and sprinkling sugar.
– To toast walnuts, heat a large non-stick frying pan over medium high heat. Add walnuts to the hot, dry pan and cook, watching constantly and stirring frequently, until walnuts starts to brown. Using walnuts is optional.
– To store banana bread, wrap the bread tightly in plastic wrap and store at room temperature overnight or in the refrigerator for up to 5 days. It can also be frozen. The wrapped loaf should be put into a resealable freezer bag and it can be kept up to two months.
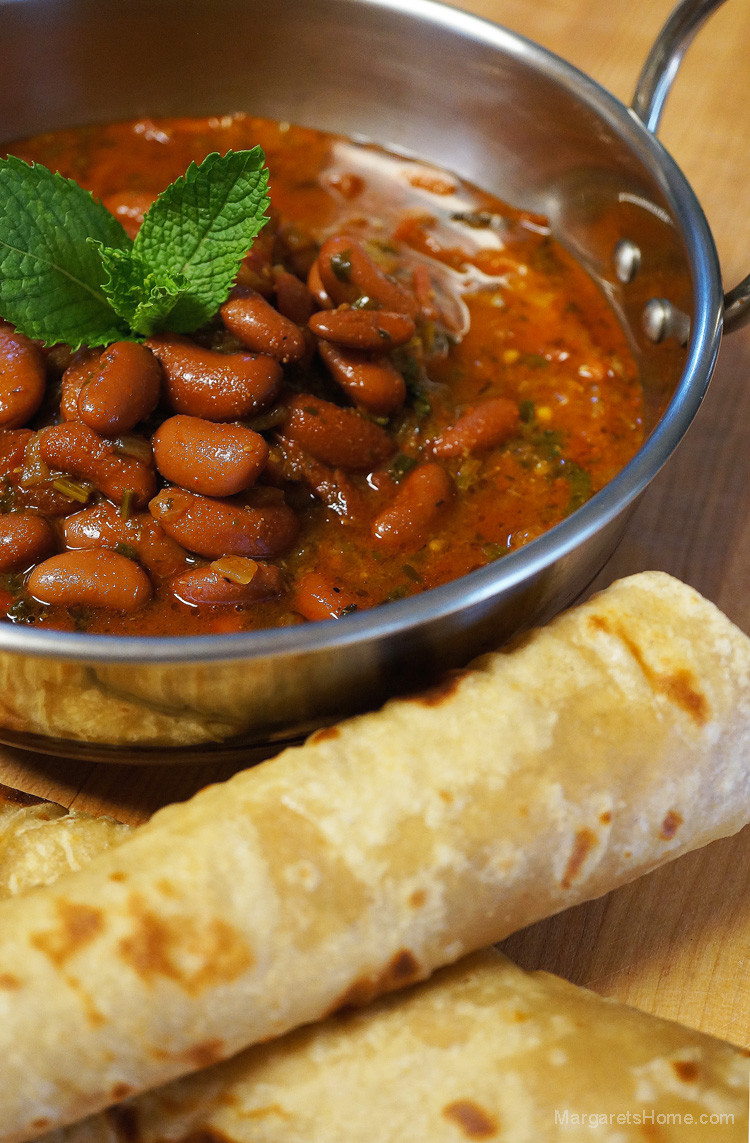