 Madhur Jaffrey says in her book Ultimate Curry Bible, “you can take meat, fish and vegetables away from an Indian, but you cannot take away his dal – the core of his meal.” Dal, in Hindi, means lentils, but the word is used for the soupy dish that you will find in the poorest as well as the richest homes in India. Every home has its own way of preparing dal. To complicate matters, there are at least 60 different kinds of dals. I learned how to cook dal (red lentils) from my mother-in-law and how to temper dal from my own mother. Cooking dal that is flavorful and creamy is an art. Let me explain.
I’ve learned from my mistakes that perfect flavor and texture cannot be achieved in a hurry. One of the first things mom-in-law did when she started cooking for the day, was to start preparing dal. A slow-cooking process was vital. She used a heavy bottomed, medium-sized pan, to cook the dal. Once the dal and water came to a boil, she turned the heat to low and went about her other kitchen chores until the dal was perfectly done. This method produced a rich, silky textured dal.
The tempering or tadka (also called tarka, chaunk, baghaar) part of making dal, I learned from Amma, my mother. Most non-Indian cooks think of tempering as a way of heating and cooling chocolate. In Indian cooking, it’s also the method used at the beginning of the cooking process or at the end of the cooking process, to flavor a dish. The ingredients are usually added in rapid succession to hot oil or ghee. Tempering dal should be done just a few minutes before serving. The aroma of sizzling spices in hot oil is one of the best parts of eating a simple meal of plain rice and dal. For me, tadka dal takes me back to when I was a young girl growing up in Pune. It soothes my spirits, cheers me up, and brings back happy memories.
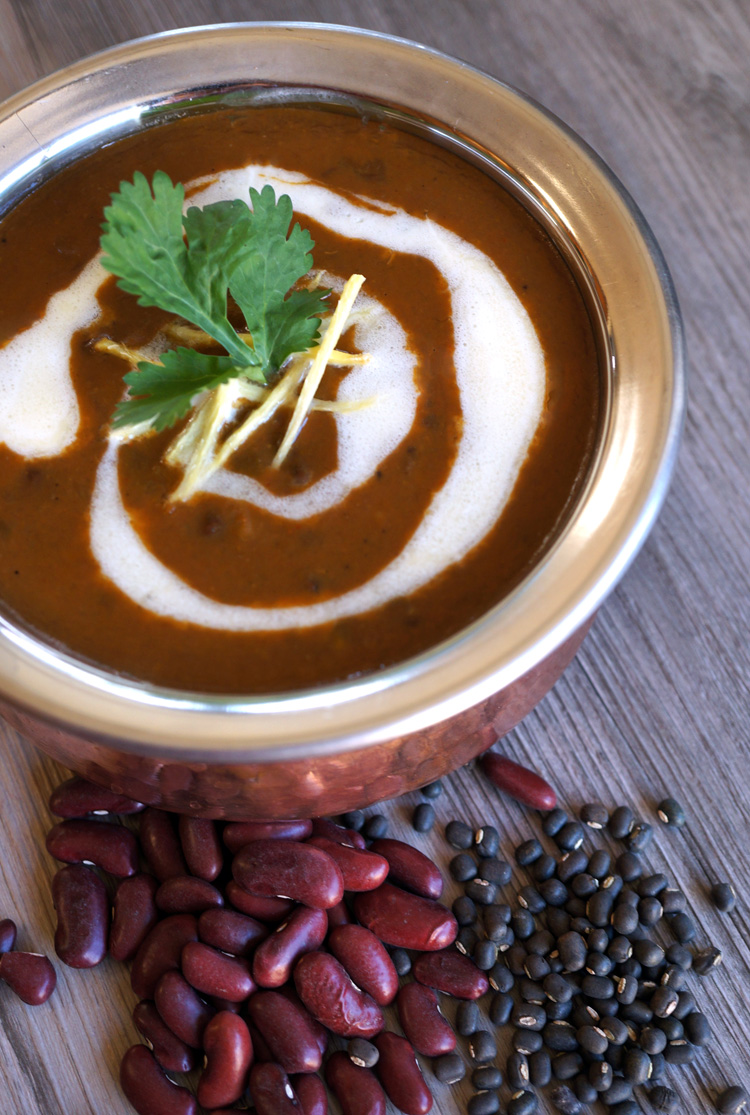
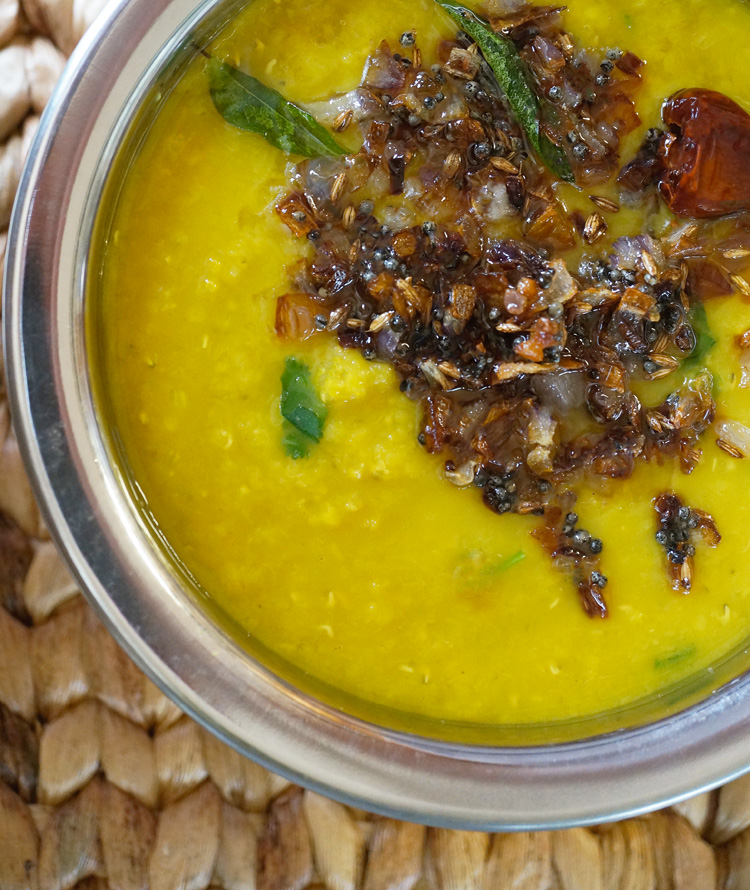
Tadka Dal – Tempered Red Lentils
Prep Time: 5 minutes
Cooking time: 40-50 minutes
Serves: 6
Ingredients:
1 cup red lentils, (masoor dal)
3 cups water (plus more hot water to achieve your preferred consistency)
2 teaspoons finely chopped ginger
2 teaspoons finely chopped garlic
1/2 teaspoon turmeric powder
Ingredients for tempering (tadka):
2 tablespoons peanut oil, (or ghee)
1/2 teaspoon black mustard seeds
1/2 teaspoon cumin seeds
1-2 dry red chillies, (depending on heat and your preference, optional)
a pinch of asafoetida, (optional)
1/2 cup diced shallots, (optional)
5 curry leaves, (optional)
1 tablespoon chopped fresh cilantro leaves, (optional)
Directions:
Wash the masoor dal (red lentils) in several changes of water until the water runs clear. Add the dal to a heavy bottomed saucepan and cover with three cups of cold water. Bring to a boil and skim off any scum that rises to the top. Add the ginger, garlic, and turmeric. Turn the heat to low. Cover with the lid, that is slightly ajar, to avoid from boiling over, and simmer gently for about 40-50 minutes. Stir occasionally until the dal is completely broken down. Use a whisk to stir until the dal becomes creamy. Add hot water to bring the dal to the consistency that you like. It can be as thin and soupy or thick and creamy as you desire. Add salt.
Having all the ingredients for the tempering process ready. Heat oil or ghee in a small frying pan over medium-high heat. When it shimmers, add mustard seeds. When the mustard seeds splutter, turn the heat to medium, and add cumin seeds, dry red chillies, and asafoetida. Fry for 15 seconds and then add the chopped shallots. Stir and cook until the shallots turn golden. Add curry leaves and fry for 20 seconds. Pour this over the dal. Add chopped cilantro as garnish. Cover with lid and let the dal stand for a few minutes. Serve with plain rice or rotis.