Fishless Tuna Cutlets

Fishless Tuna Cutlets
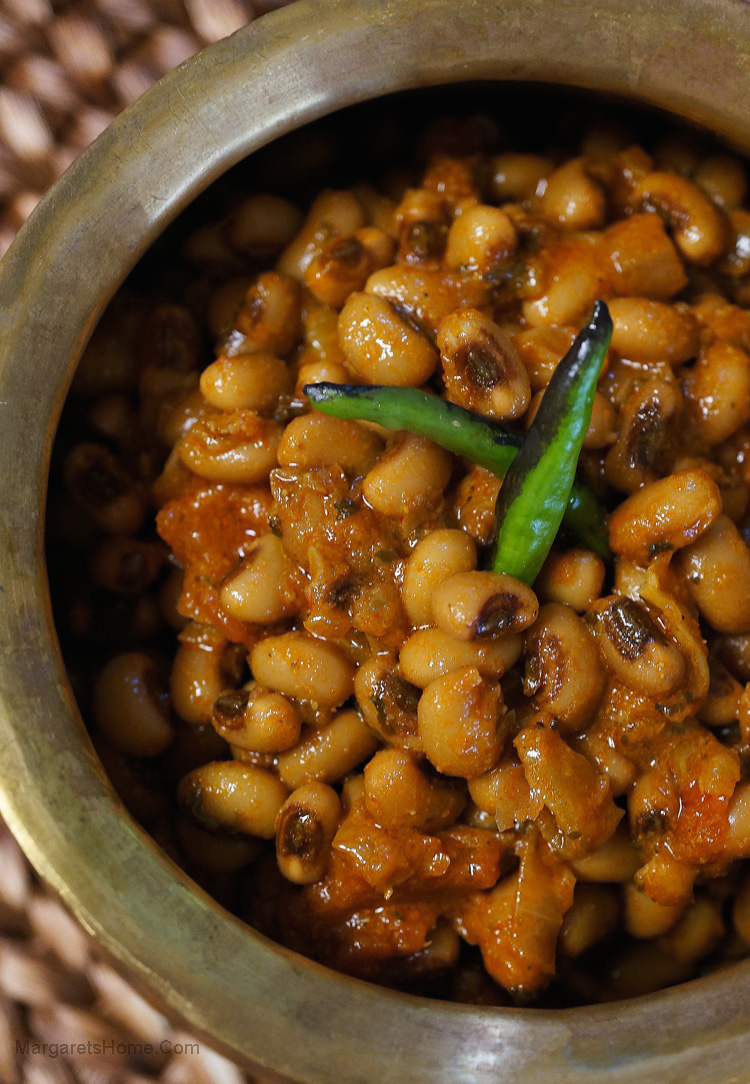
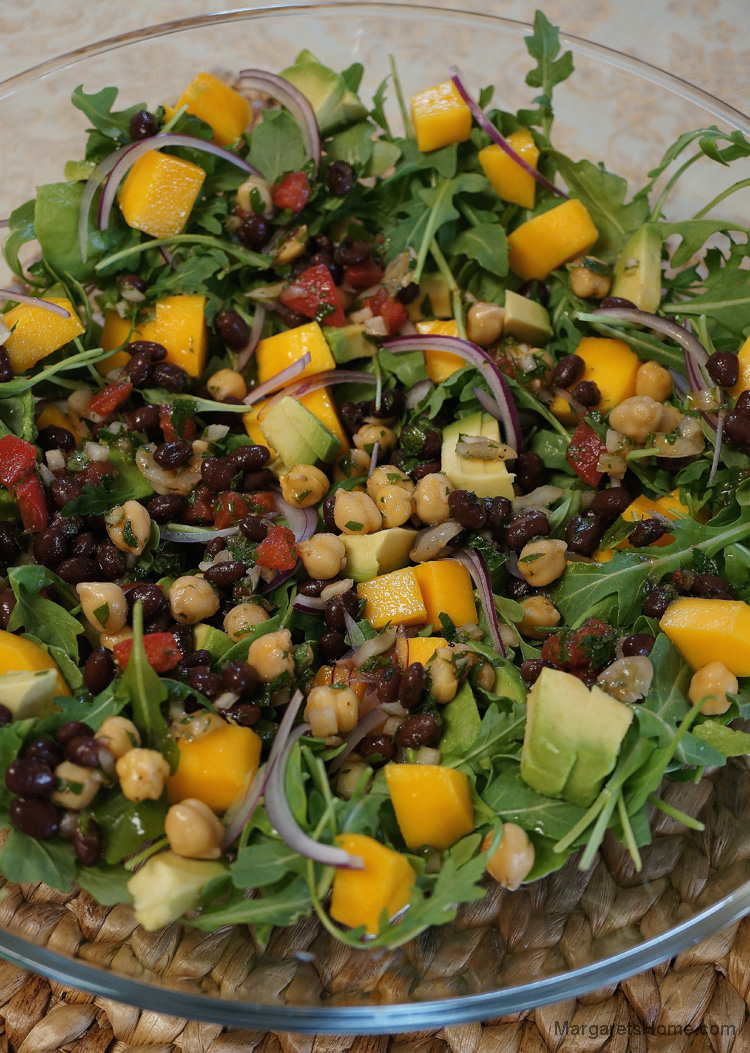
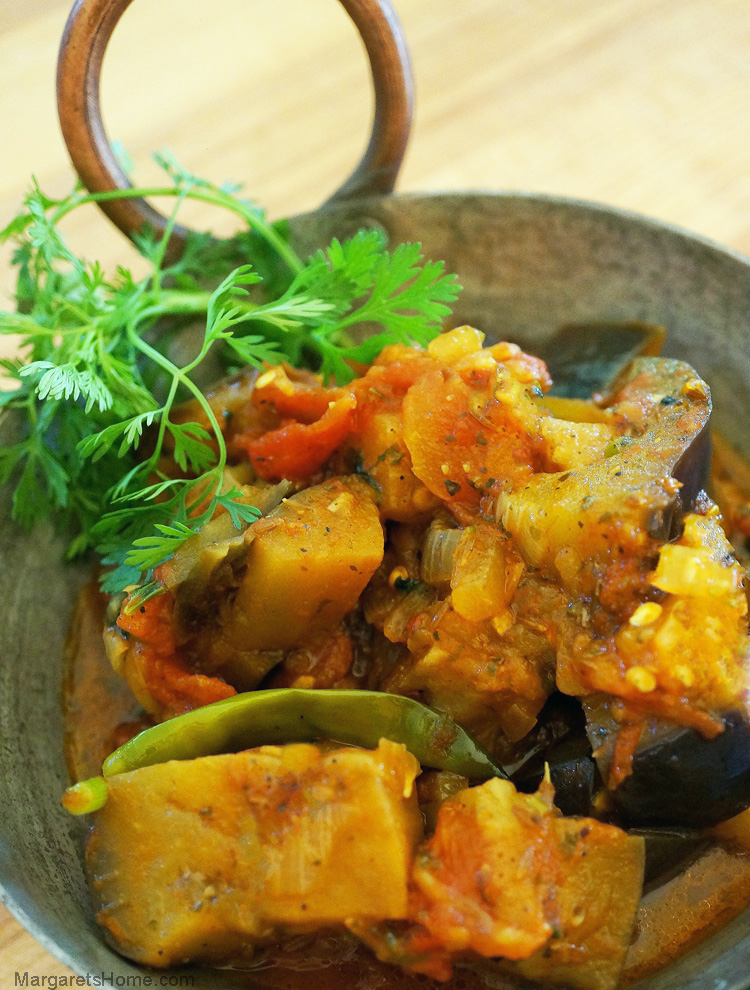
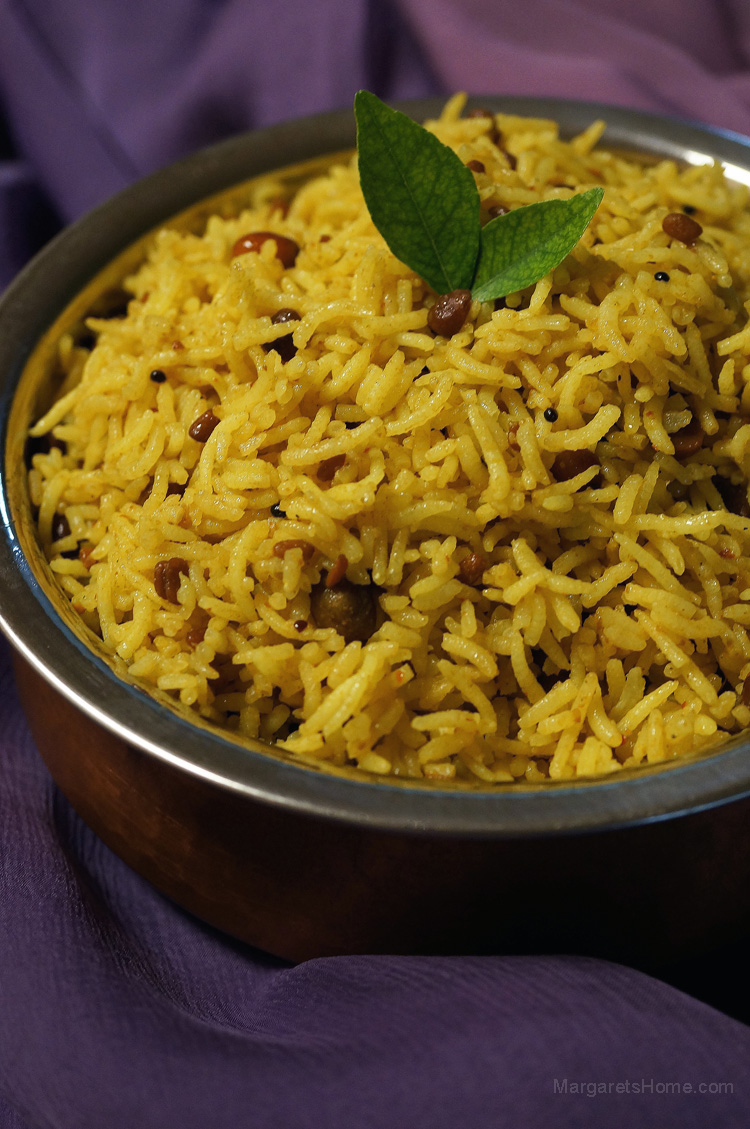
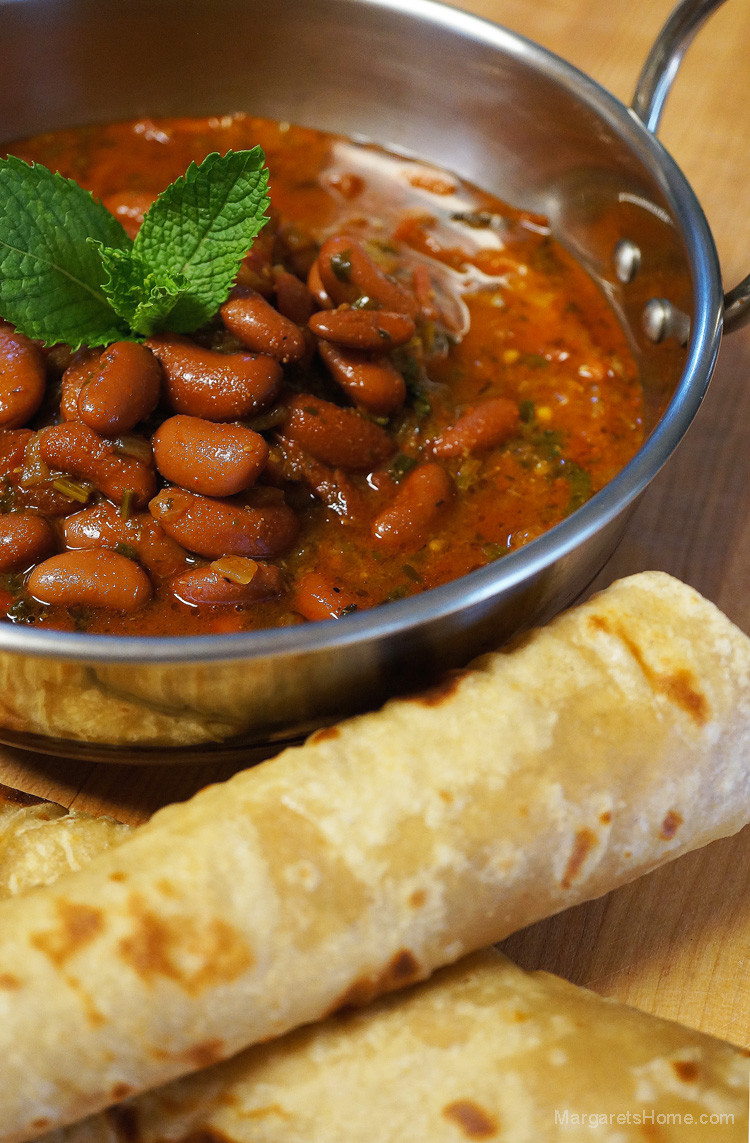
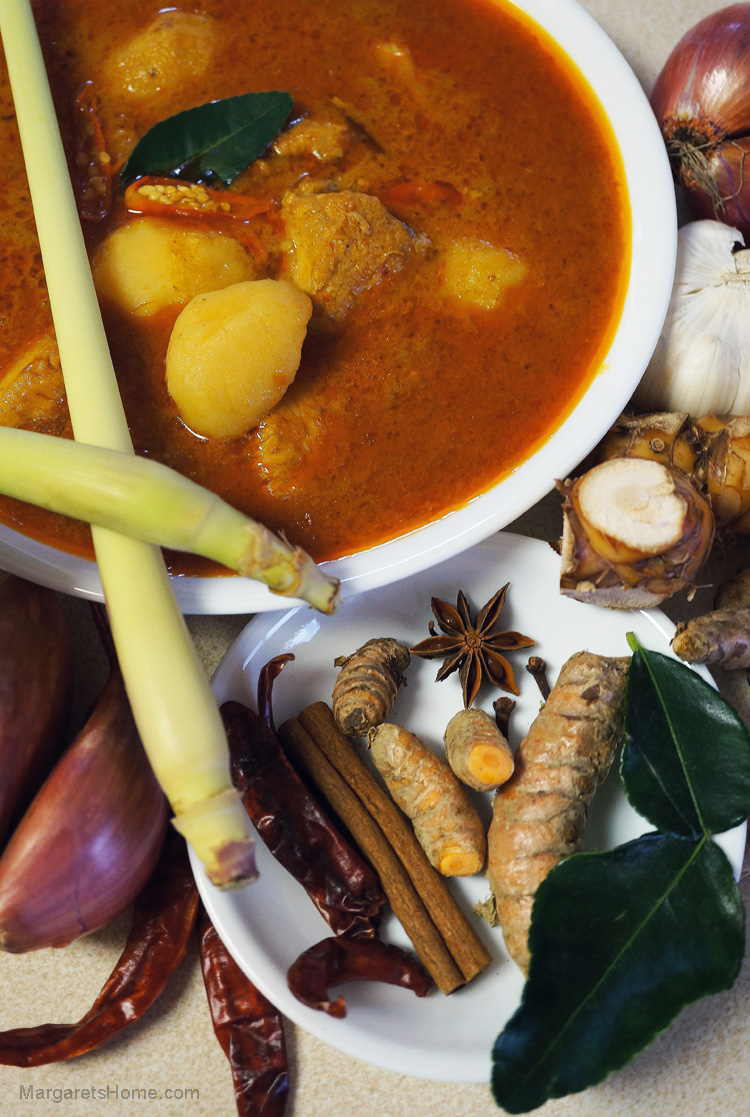
I’m sure you’ve experienced a “high” from doing something you love. That’s how I felt yesterday when I was writing this blog. I held my second cooking class this past Sunday. The compliments and praise I received for the recipes had my spirits soaring! I met some old friends and even made some new ones. Best of all, the audience relished the food, had fun, and learned how to make four of my favorite Indian dishes. My sincere thanks to those of you who attended and to Calvin David for partnering with me. And, of course, we couldn’t have done it without the assistance of Usha David and Amelia David.

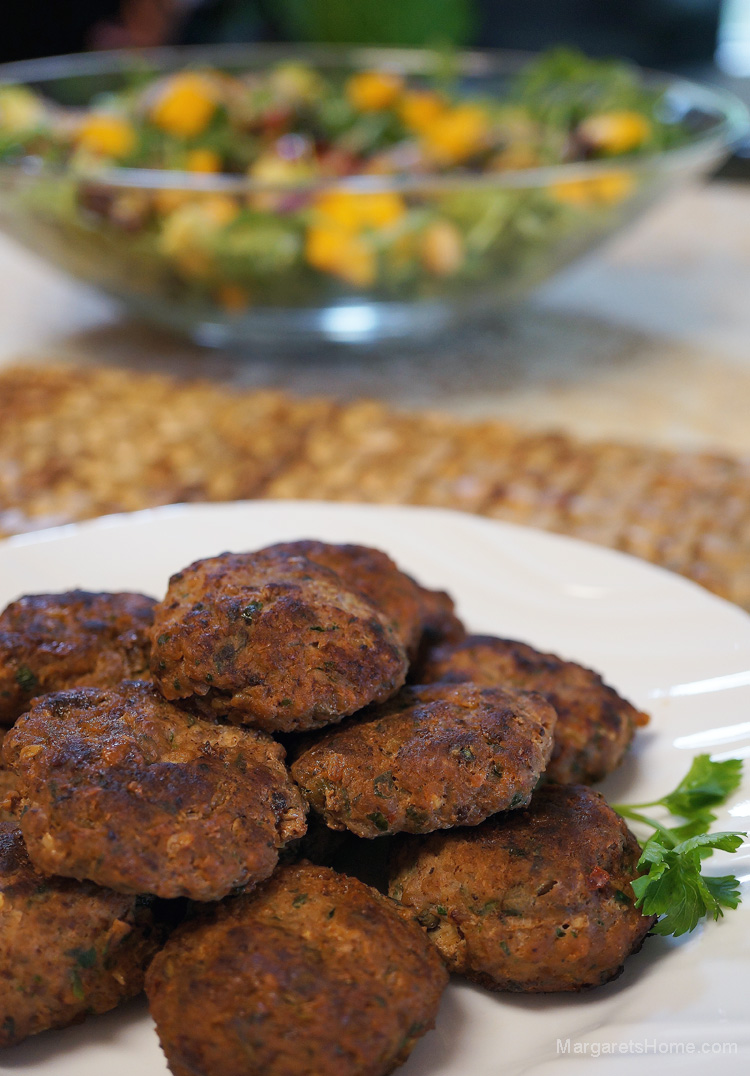
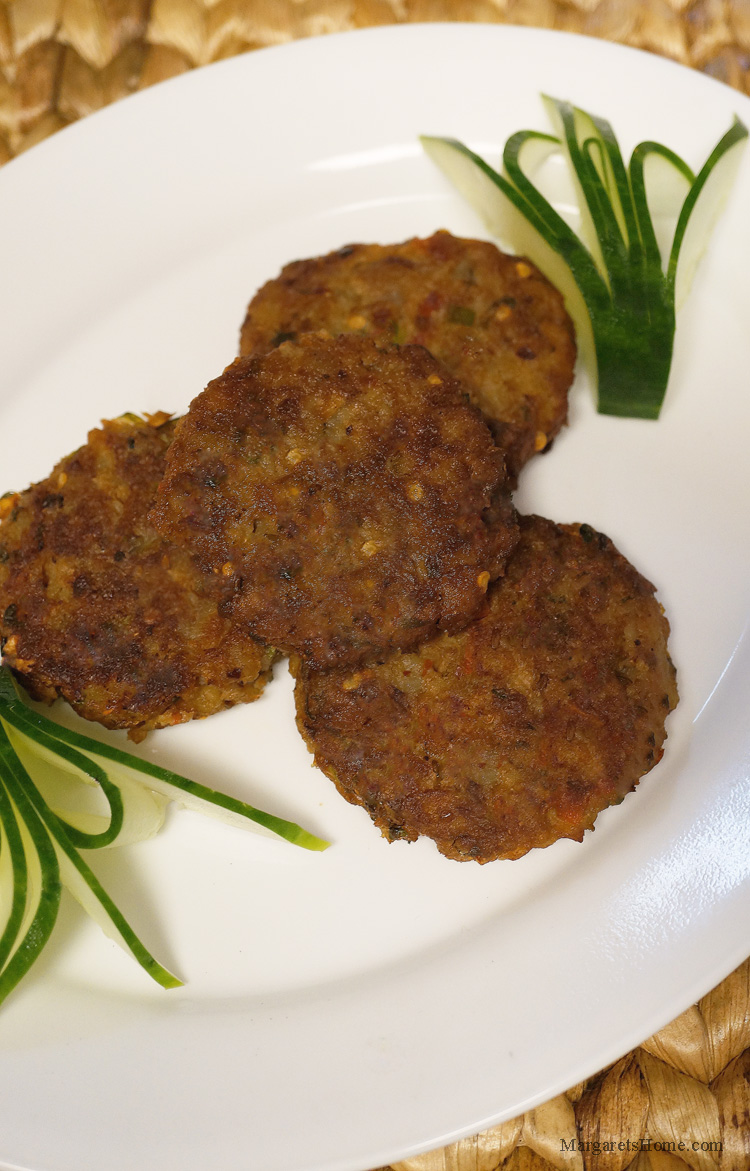
I demoed my Fishless Tuna Cutlets at the cooking class and since they were a hit, I thought I would share the recipe with my readers as well. This recipe can be used in different ways. You could make burgers and serve them in buns like I did in the picture below. Alternatively, you could make cutlets and serve them as a side dish with a meal. They would also taste awesome stuffed in pita bread, with lettuce, tomatoes, onions, and topped with a yoghurt-cucumber sauce. Yum! Try it out and come up with your own way of using this recipe. I’d love to see your results – share them on my Facebook page.

Fishless Tuna Cutlets
Prep time: 10 minutes
Cooking time: 25 minutes
Makes: 10-15

Ingredients:
3 Yukon gold potatoes, boiled, skins removed, and mashed, (about 3 cups)
2 cans (13oz/369g) Fishless Tuna, well drained
1 green bell pepper, finely chopped
1 small onion, finely chopped, (about ½ cup)
1 Roma tomato, diced
¼ cup finely chopped cilantro
5 mint leaves, finely chopped (optional)
3 green chillies, finely chopped (depending on heat and your preference, optional)
3 teaspoons chilli flakes, (depending on heat and your preference, optional)
½ teaspoon whole cumin seeds
2 teaspoons coriander powder
3 teaspoons dry mango powder, (amchur, optional)
¼ cup Bengal gram flour, (besan)
1 egg
salt
Oil for shallow frying

Directions:
Add the potatoes, Fishless Tuna, green bell pepper, onion, tomato, cilantro, mint, green chillies, chili flakes, whole cumin seeds, coriander powder, dry mango powder, Bengal gram flour (besan), egg, and salt into a large bowl. Mix well. Form the cutlets and put them on a small tray.

Place a medium-sized non-stick frying pan over medium heat and add oil for shallow frying. Add a few cutlets at a time. If you over crowd the pan, it will be difficult to turn the cutlets over. Wait until you see the bottom edges of the cutlets turn golden brown in color. Then gently turn them over. Fry the other side until golden. Remove and place on a paper towel lined baking tray.

Notes:
1. Drain the Fishless Tuna and discard the water. Put the tuna in a sieve and press it with a wooden spoon so you can get all the water out before you use it.
2. Have all the ingredients ready before you mix them together, form the cutlets, and shallow fry them. If you mix the ingredients and leave it in the bowl to rest the onion, green pepper, and tomato will give out water which will make it difficult for you to form the cutlets.
3. Fry the cutlets on medium heat until you see the edges on the bottom of the cutlets turn golden brown.
4. If you like tartness, then add the dry mango powder (amchur).
5. Both Bengal gram flour and dry mango powder can be bought from an Indian grocery store.
6. These cutlets freeze well.
7. Fishless Tuna is a product of Atlantic Natural Foods Meatless Select. The cans are available at the Potomac Adventist Book & Health Food Store in Silver Spring, Maryland.

Fishless Tuna Burger1October 22, 2014 – Attaching a picture of the cans for those that asked. If you don’t have a store that sells this, you can contact the company directly: Atlantic Natural Foods Meatless Select at: http://www.foodprocessing.com/vendors/products/2013/atlantic-natural-vegetarian-proteins/
Fishless Tuna Can Pic

The Barefoot Contessa’s Sour Cream Coffee Cake

Coffee Cake Ina 2

If you’re looking for the perfect coffee cake for brunch – this is it! Ina Garten’s Sour Cream Coffee Cake. It has a light, moist texture with a slight tang from the sour cream. The cinnamon, brown sugar and nut streusel runs through the middle of the cake and also tops it. And, as if that’s not enough, it has a delicious maple glaze that’s easy to make and absolutely yummy.

Be sure to use cake flour because it adds to the light texture of this cake. It also makes a big difference when you have the butter and eggs at room temperature before you get started. I’ve read that there was a typo in her online recipe where it called for 1/4 cup light brown sugar to make the streusel and it should have been 3/4 cup. I kept it at 1/4 cup and it was perfect so I wouldn’t change it. I hope you will enjoy this cake as much as we did.

The Barefoot Contessa’s Sour Cream Coffee Cake
Author: Ina Garten
Total Time:  1 hr 40 min
Prep time:  10 min
Inactive:  30 min
Cook time:  1 hr
Serves:  8-10

Ingredients:
12 tablespoons (1 1/2 sticks) unsalted butter at room temperature
1 1/2 cups granulated sugar
3 extra-large eggs at room temperature
1 1/2 teaspoons pure vanilla extract
1 1/4 cups sour cream
2 1/2 cups cake flour (not self-rising)
2 teaspoons baking powder
1/2 teaspoon baking soda
1/2 teaspoon kosher salt

For the streusel:
1/4 cup light brown sugar, packed
1/2 cup all-purpose flour
1 1/2 teaspoons ground cinnamon
1/4 teaspoon kosher salt
3 tablespoons cold unsalted butter, cut into pieces
3/4 cup chopped walnuts, optional

For the glaze:
1/2 cup confectioners’ sugar
2 tablespoons real maple syrup

Directions
Preheat the oven to 350 degrees F. Grease and flour a 10-inch bundt or tube pan.

Cream the butter and sugar in the bowl of an electric mixer fitted with the paddle attachment for four to five minutes, until light. Add the eggs one at a time. Then add the vanilla and sour cream. In a separate bowl, sift together the flour, baking powder, baking soda, and salt. With the mixer on low, add the flour mixture to the batter until just combined. Finish stirring with a spatula to be sure the batter is completely mixed.

For the streusel, place the brown sugar, flour, cinnamon, salt, and butter in a bowl and pinch together with your fingers until it forms a crumble. Mix in the walnuts, if desired.

Spoon half the batter into the pan and spread it out with a knife. Sprinkle with 3/4 cup streusel. Spoon the rest of the batter in the pan, spread it out, and scatter the remaining streusel on top. Bake for 50 to 60 minutes, until a cake tester comes out clean.

Let cool on a wire rack for at least 30 minutes. Carefully transfer the cake, streusel side up, onto a serving plate. Whisk the confectioners’ sugar and maple syrup together, adding a few drops of water if necessary, to make the glaze runny. Drizzle as much as you like over the cake with a fork or spoon.

Black Eyed Peas Curry – Lobia Curry

Lobia1
There are times when we need to whip up a curry in a hurry. I know many of my readers are mothers that work full time and they need to care for their families too. This dish is easy to prepare. For vegetarians, black eyes peas is a great substitute for meat and a low-calorie option. It is loaded with fiber, potassium, zinc, and iron.

You can buy dry black eyed peas, soak it overnight, cook it in the pressure cooker, and then follow my recipe to make the curry. Save one and a half cups of water that you cook the black eyed peas in because you can use it instead of the water that is called for in this recipe. Or, you can buy black eyed peas in cans from the grocery store and you can skip the soaking and pressure cooking part. The whole garam masala, that is, the bay leaf, cardamoms, cinnamon, star anise, cumin, and cloves add a lot of flavor to this dish so please don’t skip using them.

This curry goes well with rotis or rice. Try it out and let me know how it turns out. Also, if you have a good recipe for black eyes peas, please share it with me.

Black Eyed Peas Curry – Lobia Curry
Prep time: 10 minutes
Cooking time: 25 minutes
Serves: 6

Ingredients:
3 15.5oz (439g) cans of black eyed peas, drained
¼ cup oil
1 cup finely chopped onion
1 bay leaf, torn into two
2 black cardamoms
1-inch piece of cinnamon, broken into bits
½ of one star anise
1 tsp cumin seeds
2 cloves
1 tablespoon ginger-garlic paste
2 cups blanched, skinned, and diced tomatoes
½ teaspoon turmeric powder
1 teaspoon Kashmiri chilli powder
1½ cups of water
salt
1 teaspoon garam masala powder
2 tablespoons kasori methi, crushed
2-3 slit green chillies, (optional)

Directions:
Place a heavy bottomed saucepan over medium heat. Add oil and when it shimmers, add the onion, bay leaf, black cardamoms, cinnamon, star anise, cumin, and cloves. Fry the onion and spices until the onion turns light brown. Add the ginger-garlic paste. Stir constantly and cook for about two minutes or until the raw smell of ginger-garlic disappears. Add the tomatoes, turmeric, and chili powder. Stir well and let the tomatoes cook until the oil separates.

Next, add the black eyed peas, water, and salt. Let it come to a boil. Once it comes to a boil, turn the heat to low and cook for 15 minutes. Finally, add the garam masala, kasori methi, and green chilli. Stir and let it cook for another five minutes. Garnish with chopped cilantro or whole green chillies.


Arugula Salad with a Middle Eastern Twist

Hannah's Salad 1Every now and then my friend, Hannah, and I cook together. It was at one of those sessions that she whipped up this salad for lunch and shared the recipe with me. A salad within a salad, might be the best way to describe this dish. It’s a complete meal, full of protein, and fiber. Thank you, Hannah. It has become one of my favorites.

The Middle Eastern twist takes the ever popular arugula, mango, and avocado salad from ordinary to extraordinary! The recipe that I’ve included for the chickpea, black bean, and spice relish makes more than what you will need for the arugula salad. But I love having extra. It makes for a great side salad, by itself, and keeps well in the refrigerator. You can also combine it with your favorite salads to make them more elaborate, fancy, and nutritious.

I used Trader Giotto’s (Joe’s) Balsamic Glaze to make the vinaigrette. But you can use balsamic vinegar, if you desire. And one more note, before I end. I like choosing an “almost” ripe mango for the salad. That slightly tart-sweet taste of mango adds another dimension to this flavorful salad. You’ve got to taste it, to believe it!

Arugula Salad with a Middle Eastern Twist
Prep time: 10 minutes
Serves: 6

Ingredients:
1 tablespoon balsamic glaze
1 tablespoon fresh lemon juice
1 tablespoon finely chopped shallots
¼ teaspoon sugar
2 tablespoons extra-virgin olive oil
¼ tsp salt
1/8 tsp pepper
5 cups baby arugula, (about 5 ounces)
1 “almost” ripe mangoes, (pitted, peeled and diced)
2 ripe avocados, (pitted, peeled and diced)
1 small red onion, (thinly sliced)
1 cup chickpea, black bean and spice relish, (see recipe below)

Directions:
To make the vinaigrette whisk the balsamic glaze, lemon juice, shallots, and sugar in a small bowl. Slowly pour in the olive oil, while whisking constantly. Season with salt and pepper.

In a large salad bowl, combine the arugula, mango, avocado, and onion. Just before serving, add the dressing and toss gently to coat. Top with one cup of the chickpea, black bean, and spice relish. Serve immediately.

Chickpea, Black bean and Spice relish
Prep time: 10 minutes
Serves: 12

Ingredients:
1 (15.5 oz) can garbanzo beans, (drained)
1 (15.5 oz) can black beans, (drained)
2 ripe Roma tomatoes, (blanched, skinned, and diced)
½ cup diced shallots
½ cup chopped fresh flat-leaf parsley
1 teaspoon chopped mint
3 tablespoons extra-virgin olive oil
¼ cup lemon juice
½ teaspoon cumin powder
1/8 teaspoon chilli flakes, (optional)
1 garlic clove, (minced)
¼ teaspoon black pepper powder
Salt

Directions:
Combine garbanzo, black bean, tomato, shallot, parsley, mint, olive oil, lemon juice, cumin, chilli, garlic, pepper, and salt together in a bowl. Let it sit in the refrigerator for at least 30 minutes, for the flavors to blend. Use about a cup of the relish for the arugula salad and store the rest in the refrigerator for use later.

Eggplant in Tomato Curry

Eggplant and Tomato Curry1

My friends and I enjoyed the mild weather in Maryland last week by taking a long drive over the Chesapeake Bay Bridge to the Eastern Shore. On our way back we stopped by a roadside market to pick up some farm fresh vegetables and fruits. That’s where I found these beautiful, deep purple, glossy-skinned eggplants.

Eggplant is also called aubergine in France and England. In Hindi, it is called baingan. The eggplant’s ancient ancestors grew wild in India and were cultivated in China, Africa, and other parts of the world. Eggplants come in a variety of colors, shapes and sizes. When shopping for them, choose eggplants that are firm and heavy for their size. The skin should be smooth and shiny. Avoid those with scars and bruises.

Eggplants have many nutritional benefits. They are good for heart, brain, and bone health. They contains antioxidants, fiber, and B vitamins. They are also good for weight loss and cancer prevention. With all these benefits, shouldn’t we add more eggplant to our diet? Here’s a recipe to get you started.

Eggplant in Tomato Curry
Prep time: 10 minutes
Cook time: 15 minutes
Serves: 4

Ingredients:
2 large eggplants, cut into large cubes
3 tablespoons oil
1 bay leaf
1-inch piece of cinnamon
1 tablespoon finely sliced garlic
1 cup finely diced onion
4 cups blanched and diced tomatoes
3-4 green chillies, (optional, depending on heat and your preference)
1 teaspoon cumin seeds
1 teaspoon Kashmiri chilli powder, (depending on heat and your preference)
½ teaspoon turmeric powder
1 tablespoon dry fenugreek leaves, (kasoori methi)
salt
½ cup water
1 teaspoon garam masala powder
¼ cup chopped cilantro leaves

Directions:
Place a heavy bottomed saucepan over medium-high heat. Add oil and when it shimmers, add the bay leaf, cinnamon, and garlic. Fry for three seconds and then add the onion. When the onion begins to turn light brown, add the tomatoes. If you are using green chillies, slit them down the center without separating them into two, and add them. Turn the heat to medium and cook until the oil separates. Stir occasionally to make sure that the tomato-onion mixture is not catching to the bottom of the pan.

Next add the cumin, chilli, turmeric, crushed fenugreek leaves, eggplant, and salt. Add water, stir, cover, and cook for 10 minutes on medium heat. Sprinkle garam masala and two tablespoons of the cilantro leaves. Stir gently, cover, and cook for another five minutes. Garnish with the remaining cilantro and serve with rotis or chapatis.

Herbed Turkey Patties

Herbed turkey patties2

Isn’t it wonderful to have friends that readily share their recipes with you? Hannah, is one such friend, and we have a wonderful time cooking together and sharing recipes. Thank you, Hannah, for teaching me how to make these wonderful herbed turkey patties. It was great picking fresh herbs from your garden and using them in the recipe. I was so inspired by your garden, that I’ve started my own little herb garden on my deck.

I’ve modified Hannah’s recipe by changing the shape and served them for breakfast. Its a glorious fusion of herbs and spices – shallots, sage, flat leaf celery, cilantro, thyme, oregano, mint, and chilli flakes. The oyster mushroom sauce added another dimension to the complex flavor in these herbed patties. My family enjoyed every bite.

I made them for breakfast, but you can make them into meatballs as well and serve them for lunch or dinner with spaghetti and marinara sauce. They also serve as great little appetizers. Stick a toothpick into them and serve them with a dipping sauce of your choice. I even enjoyed them as a snack at tea time with sriracha on the side. You can use all the herbs or only those that you prefer. Have fun making this recipe your own.

Herbed Turkey Patties
Prep time: 10 minutes
Cook time: 15 minutes
Makes: 15

Ingredients:
3 tablespoons vegetable oil
1 lb minced turkey
1 tablespoon finely minced shallots
1 tablespoons finely minced sage leaves
1 tablespoon finely minced flat leaf celery
1 tablespoon finely minced cilantro leaves
2 teaspoons finely minced thyme
1 teaspoon finely minced oregano leaves
1 teaspoon finely minced mint leaves
1 teaspoon chilli flakes
2 tablespoons oyster mushroom sauce
1 teaspoon salt, (depending on your preference)

Directions:
In a small bowl, add the minced turkey, shallots, sage, celery leaf, cilantro, thyme, oregano, mint, chilli flakes, oyster mushroom sauce and salt. Mix it well. Wet the palm of your hands and make small lime sized turkey balls and put them on a plate.

Heat a small non-stick frying pan over medium heat. Add 2 teaspoons of oil. Add the turkey balls, as is, or flatten them to about two-inch patties. Put about five at a time in the pan. Keep the heat on medium and fry the patties for two minutes per side or until the patties cook and turn light brown. Remove on to a paper-towel lined plate. Repeat with the rest of the minced turkey mix. If the pan collects a lot of grime, wash and dry it before you fry the final batch of patties. These taste amazing, if you like fresh herbs.

Tamarind Rice – Imli Chawal

Tamarind Rice1

Tamarind rice is a tangy, spicy, nutty, flavor-infused rice dish from South India. Since the dish is made with tamarind, it keeps well without refrigeration. I am sure you will remember that I recently shared my lemon rice recipe with you. Both tamarind rice and lemon rice are popular dishes made by Indian families when they go on picnics and long journeys. There are several variations of this recipe and each dialect in India calls this dish by a different name. Here are a few – puliyodhari, puli sadam, puliyogare, and imli chawal.

Growing up in Pune, India, there were tall tamarind trees right next to my home. I remember plucking and eating raw green tamarind pods with salt and chilli powder. If you’ve done the same, your mouth must be watering just thinking about it! Tamarind pods are about five inches long and contain seeds. When they become ripe the thick, sticky pulp that surrounds the seeds have a sweet-sour taste. It can be found in various forms at the Indian and Asia grocery stores – concentrated pulp, whole dried pods, solid block form, powdered, and also in liquid form in cans. For this recipe, I’ve used the whole dried pods which I soaked in water and extracted the juice.

Did you know one of the ingredients in Worcestershire sauce is tamarind? As the story goes, the famous Worcestershire sauce was originally an Indian recipe that was brought back to Britain by Lord Marcus Sandys, the ex-Governor of Bengal. He took it to a chemist in Worcestershire, England, and asked him to make a batch of sauce from his recipe. They kept the sauce in barrels in a cellar. One day, in the middle of spring cleaning, they came across the barrel and tasted the special mixture. It had mellowed into a great sauce. The recipe was bought from Lord Sandys and today you will find Worcestershire sauce on kitchen shelves around the world. It’s a great story, however, I’m not sure if it is true!

For this recipe, I’ve made the tamarind rice spice powder from scratch. Once you’ve tried it, you will not want to use the store-bought packet again. This spice powder has a long shelf life, so you can store it in a clean bottle and use it to make tamarind rice again.

Tamarind Rice – Imli Chawal
Prep time: 15 minutes (does not include time to soak ingredients)
Cooking time: 35 minutes
Serves: 8

To make tamarind rice spice powder
Ingredients:
1 teaspoon vegetable oil
10-15 whole dry red chillies, (depending on heat and your preference)
½ teaspoon fenugreek seeds
1 teaspoon whole black pepper
½ teaspoon asafoetida powder, (hing)
6 tablespoons sesame seeds

Directions:
You only need a drop or two of oil to roast each of the above ingredients. Heat a small non-stick frying pan over medium heat. Fry all the above ingredients in the sequence that they are listed, one by one. Stir constantly while you roast each of them for 10-15 seconds or until they turn lightly brown and fragrant. When they are ready put them on a plate. Let them cool. Grind to a coarse powder in a coffee grinder. If you grind for too long the sesame seeds will turn oily. So, be careful. You will use only three teaspoons of this spice powder when you make the tamarind sauce. It keeps well and you can use the leftover spice powder when you make tamarind rice again.

To make the rice
Ingredients:
4 cups Basmathi rice
18 cups water
½ teaspoon turmeric powder
1 tablespoon salt
2 teaspoons vegetable oil

Directions:
Wash and soak the rice for 15 minutes. In a large pot, add water and bring it to boil over high heat. Add turmeric powder, salt and oil. Drain the soaked rice and add it to the boiling water. Stir and let the rice cook until al dente or almost done. Drain the water and spread the rice on a large sheet pan to cool.

To make the tamarind sauce
Ingredients:
1 cup tamarind, (tightly packed)
4 cups hot water
¼ cup sesame or vegetable oil
2 teaspoons mustard seeds
½ cup split Bengal gram
½ cup raw peanuts, (you can add up to one cup, if you like)
¼ cup split black gram
5 whole dry red chillies, (depending on heat and your preference)
1 sprig curry leaves
1 teaspoon asafoetida powder
2 teaspoons turmeric powder
1 teaspoons turbinado sugar or jaggery, (optional)
salt
2 tablespoons of sesame oil

Directions:
Soak the tamarind in four cups of hot tap water for 20 minutes. When it is cool, mash it with your fingertips to extract the tamarind juice. Strain the juice into a bowl and taste it to see if the juice is tart enough for the amount of rice that you plan to use. Adjust the tartness to suit your palate. Set it aside.

Put a large (non-reactive) pan over medium heat. Add oil and when it shimmers add the mustard seeds. When they splutter add the Bengal gram. When they begin to turn light brown add peanuts and fry for two minutes or until the peanuts are almost done. Add black gram and fry them until they turn light brown. Next, add the dry red chillies, curry leaves, asafoetida and turmeric. Fry for 10 seconds. Add the tamarind juice. Stir well and let the tamarind sauce thicken. It will take about 20-25 minutes. After the tamarind sauce thickens, add sugar, salt, three teaspoons of the tamarind rice spice powder, and two tablespoons of sesame oil. Stir, turn the heat to low and let it bubble gently for three minutes while the spices blend into the tamarind sauce.

To finish the Tamarind Rice
Directions:
If you make the same amount of tamarind rice as I did, divide the rice and tamarind sauce into three portions. Put one-third of the rice and one-third of the tamarind sauce into a large bowl. Toss gently so they mix well together. You can also use a fork to combine the rice and tamarind sauce. Once the rice and tamarind sauce is well mixed put it into a large pot. Do the same with the other two parts of rice and tamarind sauce. Cover the pot and let the tamarind rice rest for at least 30 minutes before you serve. Garnish with some fresh curry leaves.

Red Kidney Bean Curry – Rajma Curry

Red Kidney Bean Curry3

Mea culpa! On Sunday, my trigger happy finger clicked the Publish button by mistake and my subscribers received a unintentional sneak preview of the pictures for Tuesday’s blog post. I hope it built up the anticipation for today’s recipe!

Red kidney bean curry, which is called rajma in Hindi, is a traditional dish prepared in almost every home in India. It is served with rice or whole wheat bread. Red kidney beans are naturally gluten free, nutritious, and well suited for those on a vegan or vegetarian diet. It is a great source of protein and good for lowering cholesterol because of its fiber content.

This recipe is ideal for a quick weeknight meal since you’ll be using canned kidney beans and spices that are already on your kitchen shelves. You can also make this dish with dried red kidney beans, but you’ll need to soak the beans overnight and then cook them in a pressure cooker the next day.

Please note that you can adjust the heat level of any recipe that I share with you, by lowering or raising the amount of green chillies, crushed red pepper flakes, black pepper, garam masala powder, or red chilli powder. The recipe below has a higher heat level, so you may wish to adjust the level to suit your family.

I wanted to take this opportunity to thank all of you that take the time to comment and “like” my blog. You inspire me to learn, teach, and share.

Red Kidney Bean Curry
Prep time: 8 minutes
Cooking time: 25 minutes
Serves: 4

Ingredients:
1lb 13 oz (822 grams) red kidney beans
3 tablespoons vegetable oil
1 bay leaf, (tej patta)
2 black cardamoms
1-inch piece cinnamon
2 cups finely chopped onion
salt
2 tablespoons ginger-garlic paste
2 cups diced tomatoes
3 green chillies, (slit down the center – adjust depending on heat and your preference)
1 teaspoon whole cumin seeds
½ teaspoon turmeric powder
2 teaspoons Kashmiri chilli powder, (depending on heat and your preference)
1 teaspoon crushed red chilli flakes, (depending on heat and your preference)
1 tablespoon coriander powder
2 teaspoons garam masala, (depending on your preference)
3 teaspoons kasori methi, (crushed in your palm)
1 cup warm water
¼ cup finely chopped cilantro
3-4 mint leaves, (torn into bits)

Directions:
Heat a heavy bottomed pot on medium-high heat. Add oil and when it shimmers add the bay leaf, black cardamoms, and cinnamon. After 30 seconds add the chopped onion and salt. Fry until the onion turns light brown. Lower the heat to medium and add the ginger-garlic paste. Fry until the raw smell of ginger-garlic disappears, then add the tomatoes and green chillies. Cook until you see the oil separate from the tomato-onion mixture.

Add cumin seeds, turmeric powder, chilli powder, crushed red chilli flakes, coriander powder, garam masala powder, and kasori methi. Cook for 30 seconds and then add the canned red kidney beans along with the liquid in the can and one cup of warm water. Turn the heat to high and let the beans come to a boil. Once it comes to a boil, turn the heat to low, and let the beans simmer for 15-20 minutes. Garnish with cilantro and mint. Serve with plain steamed rice or rotis.

Malaysian Chicken Curry – Nyonya Chicken Curry

Malaysian Chicken Curry4

Nyonya chicken curry is one of my all time favorite dishes. I love it and it is worth hunting for all the ingredients that go into making it. Some time ago, I shared my beef rendang recipe, another one of my favorite Malaysian dishes. The next item that I will share with you, from my list of favorite Malaysian recipes, is roti canai.

Nyonya cuisine is a blend of Chinese ingredients with spices and cooking techniques used by the Malay/Indonesian community. They call their wet spice paste rempah. The cooking skill of a new daughter-in-law is judged by listening to her preparing rempah with a mortar and pestle. I definitely wouldn’t qualify as a good cook, because I used a blender to make my rempah!

When I first started experimenting with other world cuisines, many of the herbs, spices and techniques were unfamiliar to me. Some of the ingredients mentioned in this recipe may not normally be on your kitchen shelf or in your refrigerator. But with all the specialty markets springing up these days, it was easy for me to find all these ingredients. Challenge yourself and try cooking this dish. I am sure you, your family, and your friends will be delighted with the results.

Malaysian Chicken Curry – Nyonya chicken curry
Prep time: 30 minutes, (includes time for soaking chillies)
Cooking time: 30 minutes
Serves: 6-8

Ingredients:
½ cup peanut oil
1 star anise
3 cloves
3-inch piece cinnamon, (broken in half)
2 sprigs of curry leaves
3 lbs chicken, (cut into small pieces)
10 baby potatoes, (peeled, halved and parboiled)
2 Thai red chillies, (slit in half)
2 14 fl oz (400 ml) cans of coconut milk
1 kaffir lime leaf
salt
2 teaspoons sugar

For the wet spice paste (Rempah):
4 tablespoons whole coriander seeds
2 teaspoons cumin seeds
2 teaspoons fennel seeds
20 dried red chillies, (broken in half, seeded, and soaked in boiling water)
1 teaspoon fish sauce, (or one piece belacan, broken into bits)
3 tablespoons roughly chopped fresh turmeric root
3 tablespoons finely chopped galangal
3 tablespoons finely chopped lemon grass
2 tablespoons sliced garlic
2 cups roughly chopped shallots or red onions
½ cup water, (or use the water that you soaked the red chillies in)

Directions:
To make the wet spice paste, break the red chillies in half, remove the seeds, and soak them in boiling water for 20 minutes. Drain and save the water to use to grind the paste.

Next, roast the coriander, cumin, and fennel seeds in a small non-stick pan over medium-low heat for five minutes or until they smell fragrant. Cool completely.

Drain the soaked red chillies and put them into a blender. Add the roasted spices, fish sauce or belacan, turmeric root, galangal, garlic, shallots and half a cup of the water that you soaked the red chillies in.  If you forgot to save it just use water. Blend to a smooth puree.

Place a heavy bottomed saucepan over medium heat. Add oil and when it shimmers, add the wet spice paste, star anise, cloves, cinnamon, and curry leaves and sauté for 10 minutes or until you see the paste thicken, darken in color, and the oil separating from the mixture.

Add the chicken, stir until the paste coats each piece. Add potatoes, chillies, coconut milk, kaffir lime leaf, salt, and sugar. Cover and simmer over medium heat for 20 minutes or until the chicken and potatoes are cooked. Roti canai is the perfect accompaniment to this Malaysian chicken curry.

Paneer Makhani

Paneer Makhani5
Have you ever been to a restaurant and eaten a dish that you really liked and you wanted to make that dish at home? Well, this is one of those dishes that I really enjoyed in a restaurant in India and wanted to replicate at home. With every bite that I took, I tried desperately to detect what went into it. I also tried many recipes from cookbooks and finally came up with this version of paneer makhani which I felt matched what I tasted at the restaurant.

I recently made this dish for a potluck with my friends and was pleased when they asked me to post the recipe on my blog. The restaurant version had a lot of makhan (butter) floating in it, but I didn’t use as much as they did. Of course, adding an extra pat of makhan just before finishing the dish makes it richer and yummier. But I’ll let you be the judge of whether that is necessary or not when you taste my version.

There is a bit of prep work that goes into making this dish. The paneer needs to be cut into cubes, lightly fried and soaked in hot water. The onions need to be boiled and puréed. The tomatoes need to be blanched, the skin discarded, and then puréed. The ginger-garlic paste can be bought from an Indian grocery store or you can make it at home. I’ve described how to do that in the directions. Cashew nuts need to be soaked in hot water for 30 minutes and then puréed in a blender. Once all the prep work is done and you have all the other ingredients measured and ready to be used, it is easy to put the paneer makhani together. Please note that I made this dish for a large group so it is a larger quantity than I usually make. I hope you will enjoy this dish as much as I do. Happy cooking!

Paneer Makhani
Prep time: 20 minutes
Cooking time: 40 minutes
Serves: 10

Ingredients:
3 cups water
2 14 ounce (400 grams) packets of paneer, cut into cubes
2 tablespoons oil
2 large onions, (quartered, boiled, drained and puréed – 2 cups onion purée)
4 large tomatoes, (blanched, peeled, and puréed – 3 cups tomato purée)
5 tablespoons butter, plus 2 teaspoons oil
2 tablespoons ginger-garlic paste
2 teaspoons Kashmiri chilli powder
1 teaspoon hot red chilli powder
2 teaspoons coriander powder
2 teaspoons cumin powder
¼ teaspoon turmeric powder
3 teaspoons garam masala powder
salt
2 tablespoons tomato paste
1/8 teaspoon red food color, (optional)
2 teaspoons kasoori methi, (dry fenugreek leaves)
20 cashew nuts, (soaked in water for 30 minutes and puréed)
¼ cup whipping cream
2 cubes grated fresh paneer, for garnishing

Directions:
In a medium-sized saucepan, bring three cups of water to a boil, over high heat. Once it comes to a boil, turn the heat off, and set it aside. You will use this to soak the fried paneer.

Set two cubes of paneer aside to be used for garnishing this dish. Fry the paneer cubes in two batches. Add one tablespoon of oil to a non-stick frying pan and place over medium-high heat. Swirl the oil so that it coats the bottom and sides of the pan. Add half the paneer cubes and fry until very lightly colored. Remove and put them into the hot water that you set aside for this purpose. Add another tablespoon of oil to the frying pan and fry the rest of paneer cubes until light brown. Remove and put them also into the hot water. Let the paneer soak until you need to add them to the gravy, and continue with the rest of the prep work.

Cut the onions into quarters, boil them in one cup of water until they turn translucent, drain and save the water as you will use some of it in the gravy. Cool the onion and purée. You should have two cups of onion purée. Set aside. Next blanch the tomatoes in hot water, drain, cool, remove the skin, and purée the tomatoes. You should have three cups of tomato purée. Set aside. If you are making the ginger-garlic paste yourself, clean and chop a two-inch piece of ginger and eight cloves of garlic. Add them to a blender along with one tablespoon of water. Blend until a paste is formed. Set aside. Soak cashew nuts in hot water for 30 minutes and then purée in a blender until smooth. Set aside until you are ready to use it in the paneer makhani.

Heat a large heavy bottomed saucepan over medium-high heat. Add two teaspoons oil and the butter. The oil is being added so that the butter does not burn easily. When the butter melts add the ginger-garlic paste. Fry for three minutes or until the raw smell of ginger-garlic disappears. Add puréed onion. Sauté for eight minutes. Make sure that it does not burn or catch to the bottom of the dish. Turn the heat to medium-low if needs be.

Next, add Kashmiri chilli powder, hot chilli powder, coriander powder, cumin powder, turmeric powder, garam masala powder, and salt. Sauté for a minute and add quarter cup of the water in which the onion was boiled (if you remembered to save it or you can just add water). Sauté again till the water evaporates. Add tomato purée, tomato paste and food color. If you are using powdered food color, first dissolve it in a few drops of water and then add it. Stir, cover with a lid, and cook on medium-low heat for 15 minutes.

Add the cashew paste and crushed kasoori methi. Stir well, cover and cook for another five minutes. Use a slotted spoon to drain the paneer that is soaking in hot water and add them. You don’t need to squeeze the water out of the paneer pieces. Add whipped cream. Stir gently so paneer pieces are coated with the creamy gravy and cook on low heat for five minutes. Dish out into a serving bowl. Grate the two cubes of fresh paneer, that you saved to garnish the dish, and sprinkle on top. There you have it, a restaurant style Paneer Makhani.